Charcoal BBQ Tips and BBQ Recipes
Looking for more interesting dip recipes for your BBQ party?
Well, we have some great dip recipes you and your guests may enjoy! Because as we all know, having the right dips to go with the dishes and snacks is just as important as the food itself. We have already talked about quick and easy dips before, now it’s time for something more interesting, something you may not have tried.
Check out these interesting, delicious and easy homemade dips!
Delicious, Interesting and Easy Dips: Recipes
1. Beet Hummus
Hummus (alternative names: hommos, houmous) is a Middle Eastern dip which traditionally is made from blended chickpeas, tahini, lemon juice, garlic and spices. But there are also several variations of the traditional hummus. One of our favourite is the beet hummus.
It’s a very simple recipe that can be made in 10 minutes.
Ingredients:
- 1 x 400 g can chickpeas (garbanzo beans)
- 1 small cooked beet
- 1/2 tsp each cumin and coriander
- juice of 1 lemon
- 2 cloves of garlic (minced)
- 1-2 tablespoons tahini (optional)
- 3 tablespoons olive oil
- salt and pepper to taste
Directions:
Rinse the chickpeas and put them in a blender cup.
Add the rest of the ingredients to the blender cup. Blend all of this for a couple of minutes until smooth. Your beet hummus is ready!
Beets: To Cook or Not to Cook?
What is the best way to make beet hummus?
Should you buy the cooked beets from the store or cook fresh raw beets at home? In our opinion, it doesn’t make any difference. You don’t have to cook the beets, unless you want to do it all by yourself. You can buy cooked beets from grocery stores. It will speed up the cooking process.
Is Tahini Paste Needed to Make Beet Hummus?
Very often hummus is made with tahini paste. But in our opinion, it’s optional. Hummus without tahini tastes just as great.
2. Zhoug Sauce
Zhoug (or Zhug) dip originates from Yemen.
It is a hot sauce made from green hot peppers (in this case — jalapeños) seasoned with garlic, salt, red pepper and other spices, then mixed with olive oil and, later, with yoghurt (if necessary). Zhoug sauce will add a spicy cilantro flavour to your dish.
It can be used with snacks, too.
Ingredients:
- 4 tablespoons olive oil
- 2 tablespoons lemon juice
- 1/2 – 1 teaspoon crushed red pepper
- 240 ml cup fresh cilantro leaves
- 1/2 – 1 jalapeño, depending on how spicy you want it to be (if you use sliced jalapeños, it’s 8-12 slices to replace 1 whole jalapeños)
- 2 cloves of garlic, minced
- salt to taste
- 120 ml natural yogurt
Directions:
Mince garlic cloves and slice jalapeños.
Pour the minced garlic and jalapeño slices in a blender cup. Add the rest of the ingredients (except for the yoghurt) to a blender cup or a tall widemouth jar. Blend the ingredients with a hand stick blender until the mixture is even.
Add yogurt to the jar or blender cup and stir it in with a spoon.
3. Baba Ganoush
Baba Ganoush is an Arabic appetiser or dip.
It’s made from mashed cooked eggplant, olive oil, lemon juice, various seasonings, and sometimes tahini. Baba Ganoush is a creamy vegan dip that can be eaten with slices of fresh vegetables, nachos, bread and other snacks. This dip takes more time to make than most BBQ dips, but it’s absolutely worth it.
You’ll be rewarded with a delicious dip for your snacks.
Ingredients:
- 2 medium eggplant
- 3 tablespoons tahini
- 3 tablespoons lemon juice (fresh or bottled)
- 2 tablespoons olive oil
- 2 garlic cloves
- A generous pinch of cumin
- Salt and pepper to taste
- 2 tablespoons finely chopped parsley (plus extra for garnish)
- Pinch of smoked paprika (for garnish)
Directions
Preheat the oven to 200 °C and line a baking pan with baking paper to prevent the eggplants sticking to the pan. Cut the eggplants in half and coat lightly in olive oil. Place them on the pan with the halved sides down.
Roast the eggplant for 40 to 50 minutes, until they are tender and collapse to the touch. Remove them from the oven and set aside to cool.
Once eggplants are cool, peel the skin and remove the seeds. Place the peeled eggplants in a strainer and let it stand for 20 minutes (or so) to get rid of the excess water.
Put the peeled eggplants, tahini, lemon juice, olive oil, garlic, parsley, cumin, pepper and salt in a food processor or blender and blend until it’s nice and smooth. Before serving, sprinkle the dip with chopped parsley and smoked paprika.
What are your favourite quick and easy dips for BBQ?
Featured photo by Taryn Elliott from Pexels
Outdoor parties usually mean barbecue, and barbecue mean dips.
Food and snacks are important part of a successful party, and so are the dips. It’s very important to make a number of dips to go with the dishes and snacks. While it may sound like a lot of work, but actually it’s not. There are a lot of quick and easy dips for parties and barbecue. And today we’ll be sharing with you some of our favourites — 6 easy homemade dips.
BBQ dips are easy to make and often require only a few ingredients.
Quick and Easy Dips: Recipes
1. Guacamole
Guacamole is an avocado-based dip, originating in Mexico.
This dip is really easy to make, it uses fresh ingredients and is one of the best quick and easy dips you can make at home. You can eat it with tortilla chips or grilled veggies, or spread it on toast.
Ingredients:
- 3 ripe avocados
- 2 Roma tomatoes, diced
- Juice of 1 lime
- 1 clove garlic, minced
- 1/2 teaspoon salt
- 1/2 small onion, finely diced
- 3 tablespoons fresh cilantro, finely chopped
- 1 jalapeño pepper without seeds, finely diced (or a pinch cayenne pepper)
Directions:
Slice the avocados in half, remove the pit and put them in the bowl. Mash the avocado with a fork. Add the remaining ingredients and mix them together.
2. Salsa
Salsa is easy to make and delicious.
Enjoy this fresh dip with tacos or nachos!
Ingredients:
- 2 to 3 medium sized tomatoes
- 1 small red onion (or 1/2, if it’s medium sized)
- 1 whole jalapeño pepper from a jar (or 8-12 slices, if you are using sliced)
- 1/2 cup chopped cilantro
- A pinch dried oregano
- A pinch of ground cumin
- Juice of 1 lime
- Salt and pepper to taste
Directions:
Roughly chop the tomatoes, chilli peppers and the red onion.
Remove the seeds from chilli peppers and set them aside.
Put all the ingredients in the food processor and pulse a few times until the ingredients are finely diced. Transfer the mixture to a bowl. Taste it. Add salt and pepper to taste. Add some of the chilli seeds if the dip is not spicy enough. For a better taste, let the salsa sit for an hour (room temperature or in the fridge).
3. Sour Cream, Dill and Garlic Dip
This creamy garlicky dip is perfect for potato wedges, chips and grilled veggie strips.
No cooking required. Just mix together these 4 ingredients and serve.
Ingredients:
- 200 ml sour cream
- 3 cloves minced garlic
- 2 tablespoons finely shopped dill or dried dill
- A pinch if black pepper
Directions:
Add ingredients to a bowl and mix until well combined. That’s it!
The dip is ready for serving.
For a better taste, leave it in the fridge for 1 hour.
Sour cream can be substituted with Greek yogurt. You can add a pinch of chilli powder for heat.
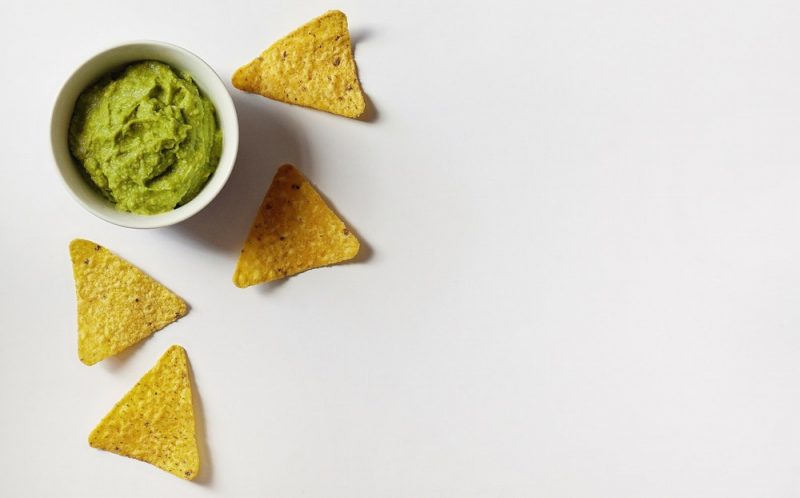
Photo by Suzy Hazelwood from Pexels
4. Sour Cream and Spring Onion Dip
A great dip to make when you are short on time.
It’s easy to make and it tastes great. Just like the sour cream, dill and garlic dip, this dip is perfect for nachos, potato wedges, chips and grilled veggie strips.
Ingredients:
- 200 ml sour cream
- 2 cloves minced garlic
- 3-4 tablespoons finely shopped spring onions (depends on how strong you want)
- A pinch if black pepper
Directions:
Add ingredients to a bowl and mix until the mixture is even. The dip is ready for serving. For a better taste, leave it in the fridge for 1 hour.
Sour cream can be substituted with Greek yogurt.
For a bit stronger taste, use both mayonnaise and sour cream. We recommend to use 1:1 sour cream to mayo ratio.
5. BBQ Sauce
BBQ sauce is one of our favourite dips for a BBQ party.
It’s perfect for dipping chicken wings and strips, giving the meat sweetness and spice.
Ingredients:
- 160 ml ketchup
- 120 ml vinegar
- 50 grams brown sugar
- 1 teaspoon ground cumin
- 2 teaspoons smoked paprika
- 1 teaspoon fine table salt
- 1 teaspoon black pepper
Directions:
Put all ingredients in a small saucepan, bring to a simmer over medium heat and cook for 5 minutes. That’s it! The dip is ready for serving.
6. Hummus
Hummus (alternative names: hommos, houmous) is a Middle Eastern dip which traditionally is made from blended chickpeas, tahini, lemon juice, garlic and spices. There are also several variations of the traditional hummus, such as the beet hummus, avocado hummus, sweet potato hummus and pumpkin hummus.
But our absolute favourite is the traditional hummus.
It’s a very simple recipe that can be made in 10 minutes.
What are your favourite quick and easy dips?
Featured photo by RODNAE Productions from Pexels
Here are 6 easy homemade chicken marinades for the BBQ.
How to marinate chicken at home? It’s easy, and it’s definitely worth it because this way the meat gains flavour and remains tender and juicy after you’ve cooked it. Marinate it in oil, lemon juice or yoghurt, flavouring it with garlic, spices or herbs. The recipes for chicken marinades are countless.
Below we have listed a few of our favourite marinade recipes.
Homemade Chicken Marinades for the BBQ
Just remember — if you want marinated meat for the party, plan ahead. You’ll need to marinate the meat in advance, as it takes a minimum of 1 hour, often more, for the marinade to do its magic.
Try these easy homemade chicken marinades for the BBQ!
1. Lemon Garlic Marinade
A simple and spicy chicken marinade.
This tangy marinade is easy to make and will add loads of flavour to your chicken. Perfect for a warm summer day BBQ party.
Ingredients (for 500 grams of chicken):
- 2 tablespoons olive oil
- 2 teaspoons Italian seasoning
- 2 cloves of garlic, minced
- Juice of 1 lemon
- Zest of 1 lemon, grated or peeled
- Honey to taste
- Parsley
- Salt and pepper to taste
- Red pepper flakes (optional)
Marinating time: at least 1 hour in the refrigerator.
For a better taste, marinate overnight in the refrigerator.
2. Garlic, Soy and Lime Marinade
A super easy chicken marinade for your next BBQ dinner.
There are only 6 ingredients, and it takes only minutes to make it. Being almost as simple as a 4 ingredient chicken marinade, this garlic, soy and lime marinade infuses the meat with deep lime flavours and gives just the right amount of sweetness.
Ingredients (for 500 grams of chicken):
- 2 garlic cloves, minced
- 2 tablespoons soy sauce
- 1 tablespoon olive oil
- Juice of 1 lime
- Zest of 1 lime
- Cayenne pepper or hot chilli pepper to taste (optional)
- 2 tablespoon finely chopped coriander (optional)
- Pepper to taste
- 60 ml water
- 3 tablespoons brown sugar
Marinating time: overnight.
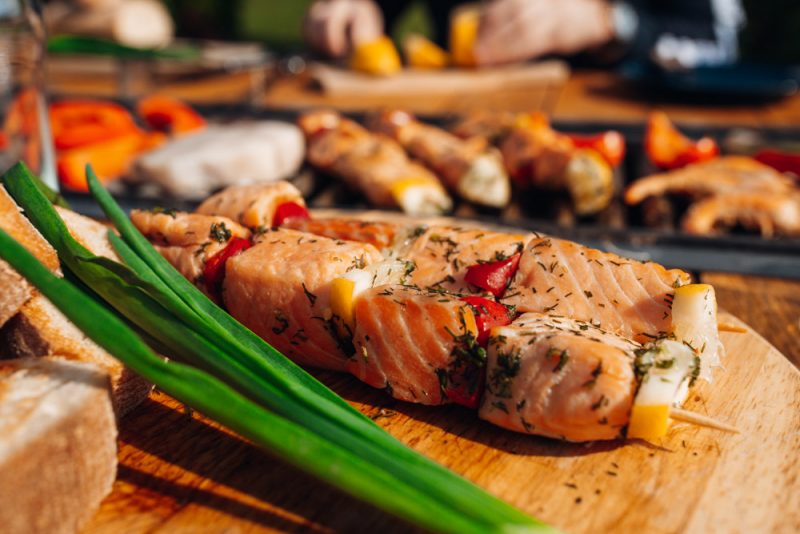
3. Chicken Kebab Marinade
Chicken kebab is one of the top BBQ dishes for many.
One of the reasons behind this being the fact that chicken kebabs are simple to make. Just marinate the meat, thread it onto skewers and cook through. Easy and delicious! If you are cooking the kebab on a charcoal grill, it will have the unique smoky taste that only charcoal grills offer.
Ingredients (for 500 grams of chicken):
- 120 ml Greek yoghurt
- 1 teaspoon paprika
- 1 teaspoon ground cumin
- a pinch of ground cinnamon
- 1 teaspoon red pepper flakes
- 3 cloves garlic, minced
- 1-2 tablespoons lemon juice
- 1 tablespoon olive oil
- 1 tablespoon ketchup
- Black pepper to taste
- Salt to taste
Marinating time: 2-8 hours.
If you have kebab seasoning spice mix, you can also use that. Mix it with yoghurt, garlic, olive oil, lemon juice and ketchup.
4. Teriyaki Marinade
A simple chicken marinade for an Asian-inspired meal.
The chicken teriyaki is the perfect option for an Asian-inspired barbecue meal. It’s easy to make and it makes your chicken delicious, juicy and tender. Teriyaki marinade gives meat sweet, savoury and tangy flavour which is favourite combination for so many BBQ enthusiasts.
Ingredients (for 500 grams of chicken):
- 120 ml cup soy sauce
- 120 ml cup water or pineapple juice
- 120 ml cup brown sugar
- 1/2 tablespoon chopped garlic
- 1/2 tablespoon Worcestershire sauce
- 1/4 teaspoon onion powder
- 1/2 teaspoon grated fresh ginger
Marinating time: at least 2 hours.
For a better taste, marinate overnight.
5. BBQ Marinade
The BBQ marinade is one of the best marinade recipes for summer grilling.
It is easy to make and will give your chicken a sweet and smoky barbecue flavour. It’s also one of our favorite recipes for chicken marinade.
Ingredients (for 500 grams of chicken):
- 4 tablespoons honey
- 4 tablespoon ketchup
- 1 tablespoon dried onion flakes (or 1 teaspoon onion powder)
- A pinch of garlic powder (optional)
- A couple of pinches of chilli (optional)
- 1 teaspoon smoked paprika
- 4 tablespoon brown sugar
- 1 tablespoon soy sauce
- Salt and pepper to taste
Marinating time: at least 2 hours, for a better taste — overnight.
6. Italian Marinade
A refreshing chicken marinade, perfect for hot summer days.
Also, it makes the chicken tender and juicy.
The Italian-style chicken is best eaten with fresh salad.
Ingredients (for 500 grams of chicken):
- 3 tablespoons olive oil
- 1 tablespoon lemon juice
- 1 tablespoon apple cider vinegar (or red wine vinegar)
- 1 tablespoon water
- 1 tablespoon minced onion
- 1 clove garlic, minced
- 1 tablespoon Italian seasoning (or use basil, thyme and oregano)
- 1 teaspoon red pepper flakes
- 2 tablespoons chopped parsley and / or basil
- Salt and pepper to taste
Marinating time: 1 – 12 hours.
How to Marinate Chicken at Home?
What containers can you use for marinating?
Method 1 — Zip-Lock Bag
You can place all the ingredients in a large resealable freezer bag / zip-lock bag. Seal and shake to combine the ingredients. Then place the meat in the bag. Close the bag and move the meat around to coat it in the marinade. Massage the meat to distribute the marinade evenly.
Put the zip-lock bag in the fridge.
Method 2 — Plastic Container
Mix all the ingredients in a plastic container with a lid. Put the meat in the marinade, close the lid and shake the container well. Pierce the meat with fork so that the marinade seeps through and gives it a deeper flavour.
Put the container in the fridge.
Method 3 — Metal Bowl
Mix all the ingredients in a metal bowl.
Cover the meat in the marinade. Cover the bowl with aluminium foil.
Put the bowl in the fridge.

How Long Do You Need to Marinate the Chicken?
If you don’t have much time, 1 or 2 hours will be OK.
Just remember that the flavour won’t be as intense as when you marinate the meat for a longer period of time. At the same time it’s important to understand that you also shouldn’t be marinating for too long.
How long is enough, and how long is too long?
It depends from the type of marinade you plan to use.
Acidic marinades (lemon juice, vinegar, yogurt) can ruin your chicken if you marinate it too long. It’s best to leave the marinated meat in the fridge for a maximum of 5-6 hours. If you leave the chicken in the marinade for too long, the meat will become dry and stringy, and the texture will be ruined.
If the marinade doesn’t contain acid — up to 48 hours.
Not all homemade marinades for chicken work the same way. Take that into account when you’ll be looking for marinade ideas for chicken and choosing the one for your next meal.
For more tips see our Charcoal Grilling 101.
What are your favourite chicken marinades for the bbq?
Featured photo by Karolina Grabowska from Pexels
It may surprise you, but you can actually make a pizza on BBQ.
The best part is that it’s quite easy, really, and requires only a few ingredients. Especially if you’re going to use a ready-made pizza base. There are hundreds of recipes for grilled pizza, and here is one of our favourite grilled pizza recipes. Be warned — these pizzas are seriously addictive, and you might end up eating a bit too much of them!
You can cook just about any food on a charcoal grill.
Charcoal Grilled Pizza Recipe
Make your own charcoal grilled pizza in 10 minutes.
Ingredients (4 pizzas):
- 4 Large “Santa Maria” pizza tortillas or large “Santa Maria” ordinary tortillas
- 125 g pack of mozzarella cheese
- 150 — 200 g semi-hard cheese (such as Gouda or Edam)
- 10 tablespoons tomato paste
- Salami/pepperoni (spicy is the best) — 4 large slices for 1 pizza (or 10-12 small ones)
- A few jalapeños from a jar to taste
- Pitted black olives
- A bit of olive oil
- Dried oregano
- A few teaspoons of basil pesto (optional)
You don’t need a grill pizza oven for that.
Directions:
First, prepare your toppings.
Slice mozzarella and pepperoni/salami, grate Gouda or Edam cheese, and slice the jalapeños.
Then put the pizza base on the pan or directly on the grill grates (they must be greased) and cook it on both sides. Take it off, put it on a plate and cover with a little bit of olive oil. Then cover it with tomato puree.
Now arrange your toppings evenly.
First the salami, then the mozzarella slices, jalapeños and olives. End with the Gouda or Edam. Sprinkle the oregano. Drizzle some pesto (optional) over the pizzas.
Finish cooking on the grill or pan, until the cheese has melted.
Your grilled pizza is ready!
Featured photo by Engin Akyurt from Pexels
Here is our favourite, easy hummus recipe.
Hummus (alternative names: hommos, houmous) is a Middle Eastern dip usually made from blended chickpeas, tahini, lemon juice, garlic and spices. It’s a very simple recipe that can be made in 5 to 10 minutes. Very often hummus is made with tahini paste. But in our opinion, it’s optional — hummus without tahini tastes just as great.
Easy Hummus Recipe
Hummus is super tasty and super easy to make.
Ingredients (2 servings):
- 1 x 400 g can chickpeas (garbanzo beans)
- 2-4 tablespoons of water
- 2 tablespoons extra virgin olive oil
- 1 tablespoon lemon juice (from a bottle or squeezed from a lemon)
- 1 clove of garlic, minced
- 1 teaspoon ground cumin
- A pinch of salt
- 1 teaspoon tahini paste
- A pinch of chili powder (optional)
- A few parsley or coriander leaves (optional)
In just a few minutes, you will have creamy delicious homemade hummus which is better and cheaper than store-bought. You can enjoy hummus with grilled bread, toast or flatbread, grilled paprika, potatoes and other veggies.
Directions:
Rinse the chickpeas and put them in the blender cup.
Add water, olive oil, lemon juice, garlic, cumin and salt, and the optional ingredients if you choose to. Blend all of this for a couple of minutes until smooth.
Your simple hummus is ready!
Easy Hummus Recipe Without Tahini Paste
Most of people make hummus with tahini paste.
However, we believe it’s optional. Take the same ingredients except for tahini paste, follow the same directions, and you’ll get a similar as tasty hummus. There’s also a possibility that you will like it this way even more, as not everyone like the taste of tahini.
Enjoy!
Featured photo by Nataliya Vaitkevich from Pexels
How to tell if meat is cooked?
How to tell if a steak is medium rare?
While in some situations the internal temperatures of cooked meat are a personal preference, it also plays an important role in food safety. Especially, since it’s the easiest, most popular and all in all the best way to tell if the meat is cooked properly — by measuring its internal temperature with a food thermometer. All raw meats can carry harmful bacteria, so it’s crucial that it’s properly cooked.
You also have to know the right temperatures for safe meat.
How to Tell if Meat Is Cooked?
When you are cooking a beef steak, the internal temperature of it is mostly about your personal preference. However, when it comes to other types of meat, not all temperatures are safe.
So, how do you determine if meat is cooked properly?
It’s simple — you use a meat thermometer.
Safe temperatures for cooked meat vary for each type of meat.
If cooking for a pregnant woman, make sure to double check that the food is properly cooked. Raw and undercooked fish and meat can contain parasites and bacteria which can be harmful for a pregnant woman and her unborn child.
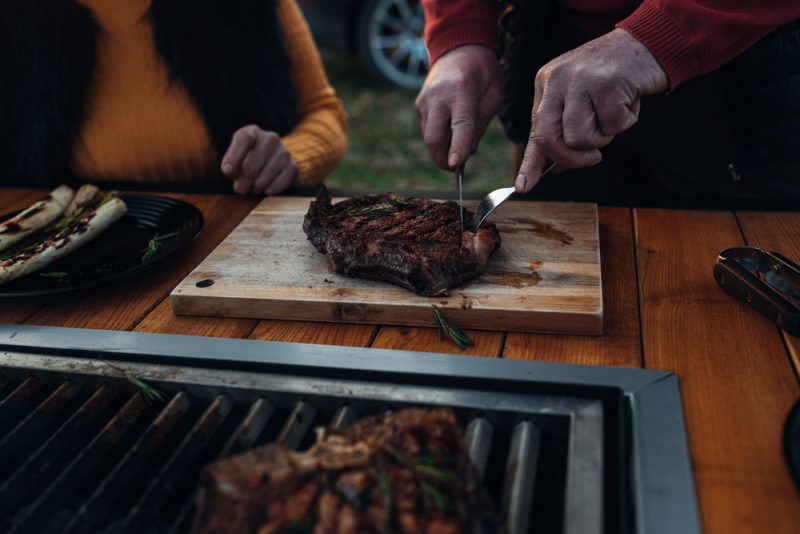
How to Tell When a Steak Is Done?
You have to know about the degrees of steak doneness.
Beef steak or joint carry bacteria only on the outside, so it can also be eaten when it’s rare (when it’s pink on the inside). As long as the outer part is done. With other meats you have to sear the meat to kill all the bacteria that is on the outside of the meat, then move the meat to the less hot part of the grill to finish cooking and kill the bacteria inside the meat.
There are 6 degrees of beef steak doneness:
- Blue rare. Seared outside and completely red inside. Cold and soft centre. Internal temperature — 46-49 °C.
- Rare. Seared outside, cool and mostly red (75%) centre. Internal temperature — 51-54 °C.
- Medium rare. Seared outside, warm canter and 50% red interior. Medium rare steak internal temperature — 54-60 °C.
- Medium. Seared outside, hot pink centre with slight red. Internal temperature — 60-65 °C.
- Medium well. Seared outside, hot slightly pink centre. Internal temperature — 65-68 °C.
- Well done. Seared outside and cooked through. Firm and much drier. Brown centre. Internal temperature — 71 and more °C.
How to tell if steak is done without thermometer? There aren’t any precise methods to determine that, so you’ll have to practice, or better — use a thermometer, follow the “Temperatures of cooked meat” chart you see here, and get the perfect steak every time.
Chicken
How to tell if chicken is done?
Unlike beef, chicken has to be cooked through well. It is because it can contain bacteria not only on the outside but also inside. Eating undercooked chicken can cause salmonellosis. That’s why it’s important to know the temperature at which chicken is done, and also to follow it during the cooking process.
Safe internal temperature for chicken and poultry: 75 °C (minimum).
Pork Chop
How to tell if a pork chop is done?
Just like chicken, pork chops must be cooked well as they can have bacteria all the way through the meat. Since you can’t tell if the meat is cooked or no just by cutting into it or poking it, especially if you aren’t experienced with barbecuing, it’s better to use a meat thermometer instead.
Safe minimum internal temperature for pork chops: 63 °C.
Let it rest for three minutes before carving and eating.
Sausages
How to tell if a sausage is cooked?
The safe cooking temperature for raw sausages and hotdogs is 71 °C.

Fish and Seafood
How to tell if fish is cooked? What about seafood?
Fin fish should be cooked to an internal temperature of 63-70 °C, until its flesh is opaque and separates easily with a fork. Shrimp, scallops, crab and lobster — until the flesh is pearly or white, and opaque. Oysters, clams, mussels — until the shells open.
Salmon
How to tell if salmon is cooked?
It’s believed that a safe minimum internal temperature for salmon is 63 °C. But many people find salmon cooked at such temperatures dry and overdone. So that’s why many cook wild salmon to about 49 °C, and farmed salmon — to 52 °C. However, remember that you are doing it at your own risk. If you are cooking salmon for a pregnant woman, make sure you cook it to 63 °C.
Measure the temperature in the thickest part of the salmon filets.
When using a meat thermometer, don’t forget to clean it in between uses to avoid cross-contamination in case the meat has not yet reached a safe temperature when you are checking it.
Read more: Charcoal Grilling 101
That season has arrived, and you can’t wait to spend more time outside.
You want to try cooking in your backyard, you have a charcoal grill (or you plan to buy one), but there is one but. You aren’t sure about your charcoal cooking skills. You aren’t sure whether you even know how to grill on a charcoal grill. And that matters. It’s important to know how to use a charcoal grill safely — how to start it, how to cook with charcoal, and what to avoid.
So it doesn’t destroy neither your meal, nor your mood.
Read on to learn more about the basics of charcoal grilling.
How to Grill on a Charcoal Grill: Basics
1. How to Start a Charcoal Grill?
First, put your charcoal grill in a safe place.
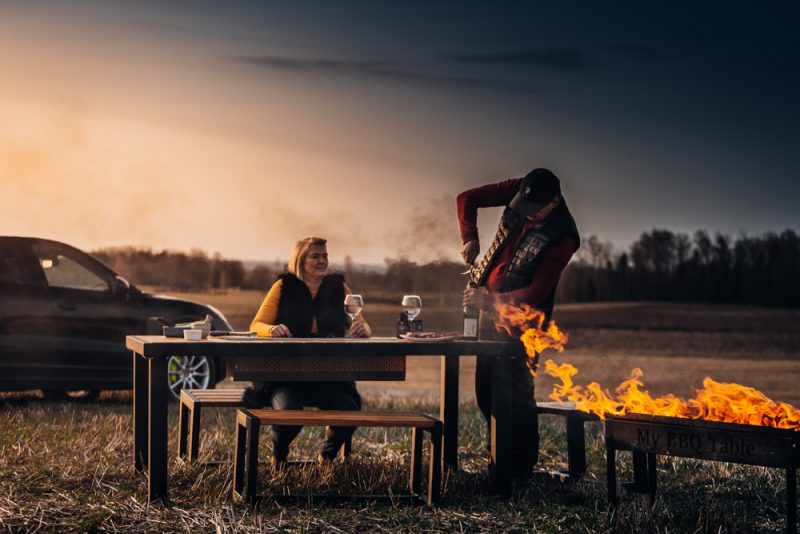
Floating embers can easily spark a fire! Take that into account when choosing a place where to put your grill. If you own a My BBQ Table set, take off the grate and take the grill section out of the grill table and place it on its stand. All our sets come with a dedicated stand and removable handles for safe carrying.
Now you can start a fire.
Pour in some 2 kilos of charcoal briquettes.
Cover them with some firewood or wood chips.
Pour lighter fluid, wait a minute or two and light the fire.
Some 15 – 20 minutes later, once all the firewood is burned up, the grill is ready for cooking. At this moment all or most of the charcoal must have turned white or grey — that’s the easiest way to tell if charcoal is ready to cook on.
Read more: How to Start a Charcoal grill?
1.1 What Type of Charcoal to Use?
Should you use coal for bbq or briquettes?
We recommend you to use charcoal briquettes.
Charcoal briquettes burn longer and maintain a steady temperature for a longer period of time than regular lump charcoal. They are perfect for longer grilling sessions such as BBQ parties and BBQ brunches. True, charcoal briquettes are a harder to ignite, but at the same time require no extra work from you afterwards — you can enjoy the process more.
As our experience shows, a 2-kg bag of charcoal briquettes and a 2-kg bag of firewood (to start a grill) is enough for a 5-hour long grilling session.
1.2 How to Light Charcoal Without Lighter Fluid?
There are several ways to light a charcoal grill bbq.
By far the easiest option is to use lighter fluid.
Some BBQ enthusiasts do not recommend using lighter fluid for barbecue, because of the taste it might give and the chemicals it consists of. However, we believe that it causes no danger, as long as it’s done properly and you aren’t rushing. The key here is to let the fire to go on for these 15 – 20 minutes, for all the firewood to burn up, and accordingly for the fumes of the lighter fluid to dissolve as well. And, of course, don’t use too much of the fluid.
Here are a few other, alternative methods:
- Chimney starter;
- Lighter wood or firewood;
- Fire starters (and paper or dry sticks);
- Paper and vegetable oil / cooking oil;
- Electric charcoal grill fire starter (one of the best gifts for BBQ lovers).
Read more: How to Light Charcoal Without Lighter Fluid or Chimney?
1.3 Preheat the Grill Well
Definitely don’t rush things!
Don’t put your food on the grill seconds after you have lighted it up. You have to preheat your grill first. Wait 15 to 20 minutes as the grill heats up and coals turn grey. Only then food can go on the grill. It’s especially important if you are using lighter fluid to start a grill. You want the fumes from the lighter fluid to be gone — so your food doesn’t taste or smell of it.
Another reason not to rush — if you put your food on the grill right away, it will end up staying on the grill too long. It will lead to dry and overcooked foods. If you place the meat on cool grill grate, it won’t sear fast and will lack that lovely smoky grilled flavour.
1.4 Clean the Grate
Don’t forget to clean the grill grate with a grill brush after every use.
If you cook on a dirty grill grate, the food will stick to it and won’t taste as good as if it was cooked on a clean grate. You don’t have to clean the whole grill after every use.
Read more: How to Clean a Charcoal Grill?

2. How to Control Temperature on a Charcoal Grill?
You can’t dial down the temperature on a charcoal grill.
At the same time it doesn’t mean that you can’t control it.
2.1 Direct vs. Indirect Grilling
You can control temperature by setting up two zones.
One of our best charcoal grilling tips – position coals on one side of the grill for direct grilling. Leave the other side coal free for indirect grilling. How does a two-zone grill work?
Direct grilling is quick and hot. It uses high heat and is perfect for cooking items like burgers, steak, kabobs, fish, hot dogs, vegetables and pork chops.
Indirect cooking, on the other hand, uses low heat and is for slow-cooking. Use this method to cook large or tough pieces of meat that requires long and slow cooking. You can also use this side of the grill to keep your food warm.
3. How to Prevent Flare-ups?
Follow these easy steps to prevent flare-ups:
- Remove excess fat, sauces or marinade before grilling;
- Don’t over-oil your food;
- Avoid wind;
- Clean your grill to remove food residue and old grease;
- Leave one side of the grill coal free, so you can move your food there in case of flare-ups.
How to put out a grill fire? Move the dripping food to the coal free part of the grill and let the flare-up subside. Never use water to put out a fire!
Read more: Charcoal Grilling Safety Tips
4. How to Prepare Food for Grilling?
Grilling on charcoal is very different from cooking in your kitchen.
Once you’ve started it, and the coals are going and starting to grey, there’s no way to slow it down. You’ll be cooking now, and at the temperature you have. You can’t turn off the grill for 5 minutes to do some extra preparations. Everything has to be prepared in advance.
Prepare everything before you start the grill. Once your grill is going, there will be no time to cut and season veggies and meat. The temperature is high, and the food which is already on the grill might burn while you are preparing other food.
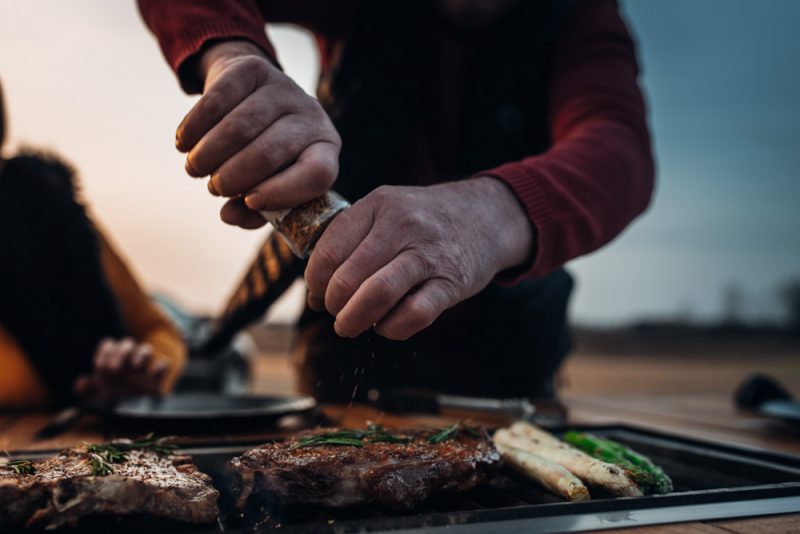
How to prepare meat for grilling?
Let it sit at room temperature before grilling, and don’t forget to season it before grilling. The same stands true when charcoal grilling fish. If the meat is covered in marinade, wipe off the excess marinade before cooking to prevent flare-ups. Keep just a little marinade on the meat to enhance flavour. Don’t press down on the meat while cooking it on the grill — pressing on your meats squeezes out the juices which can lead to a dry burger or steak.
Be careful with sweet sauces. Don’t add them too early, or you’ll get your food burnt. To avoid this, add the sauce towards the end of cooking.
If you are planning to grill vegetables, don’t cut them too thin, or be extra cautious when cooking. Otherwise they will burn the moment you take your eyes off of them.
That’s it in a nutshell — charcoal grilling for beginners.
Now you know how to grill with a charcoal grill, and it’s time to try it.
For more tips see our Charcoal Grilling 101.
Looking for unique BBQ gift ideas?
Are you currently looking for a gift for your BBQ-enthusiast friend? And now you are confused by the wide range of grilling accessories, and don’t know what to choose? This is totally OK, especially if you are not experienced in this field. We are here to help you — we have made a list of some of the best gifts for BBQ lovers, our favourite BBQ accessories and equipment.
All you have to do is to read on to choose the one!
Best Gifts for BBQ Lovers: Our Favourites
The best grill accessories are not cheap.
But they are so worth it! High quality tools are well-made and last very long. Check out this list of great grilling gifts for men and women. This will help you to understand what are the best options on the market right now — what are the best gifts for BBQ lovers.
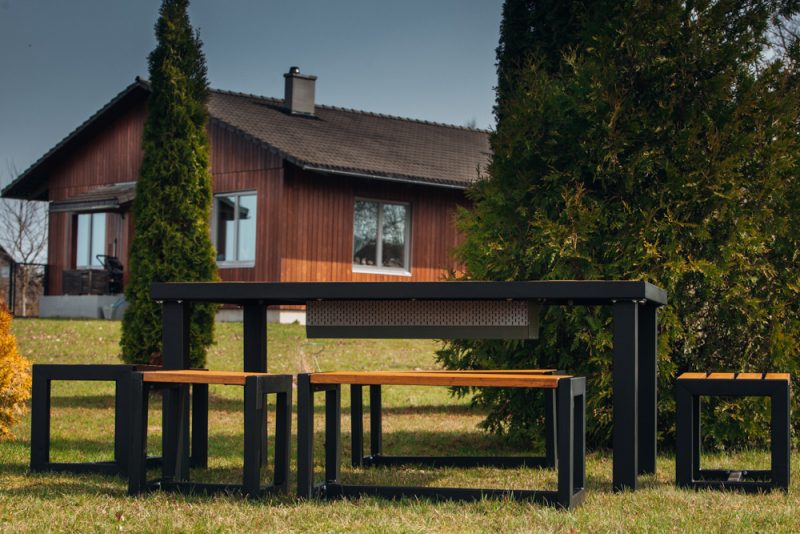
1. My BBQ Table Set
Official site: mybbqtable.com
It’s time to take barbecuing to the next level.
It’s time for My BBQ Table set, one of the very best BBQ lovers gifts (for the most special people). For years it was just a dream, also our founders dream, now it’s available to everyone. My BBQ Table is an all-in-one charcoal BBQ grill table set, designed to make outdoor cooking much more social, and you as a result — a happier person. It isn’t just a table but a set. The table comes with chairs, and can comfortably seat 8 people. It’s sturdy yet elegant and will look great in every setting. It’s the set that’s built to last years.
My BBQ Table is spacious enough for everyone to cook their favourite food. With My BBQ Table, you don’t need to sacrifice a chance to eat your favourite foods, just to make sure others are getting their favourite food. Here are a few more reasons to love My BBQ Table.
Thanks to its charcoal grill the set is cheaper than alternatives which use gas. Better value for money is just one of the reasons why people choose charcoal grills over gas grills.
2. Electric Charcoal Grill Fire Starter
Our Pick: Looft Lighter X
Official site: eu.looft.com
Starting a charcoal grill takes some time.
Many people use lighter fluid to start a grill, others prefer to light charcoal without lighter fluid. If you don’t want to use lighter fluid, try an electric charcoal grill fire starter like Looft Lighter X. It is by far the easiest and fastest alternative, and also one of the best gifts for BBQ lovers.
Looft Lighter X is an electric charcoal fire starter that is as effective as lighter fluid. It’s super easy to use, and all it requires is a single device. The way these things works is they use super heated air to ignite the charcoal. You keep the device very close to the coal, pointing to one spot, and wait, and that’s all. With Looft Lighter X the waiting time is only around a minute. After a minute, the charcoal is ignited and it starts to burn. Remember, that you can’t place food on the grill right away. You have to wait until the charcoal is ready — when it has turned grey.
Looft Lighter X is wireless. With one charge, you can use it multiple times (max 10, with optimal use). It comes with a charging base.
3. High Quality Grill Brush
Our Pick: Grill Rescue Grill Brush with Scraper
Amazon: amazon.co.uk
Official site: grillrescue.com
Did you know that cheap grill brushes can be dangerous?
They contain wire bristles that can break off and remain on the grill grate. Eventually they can end up in the food you are cooking, and, when ingested, cause damage to your stomach or intestines.
The Grill Rescue grill brush, on the other hand, has no harmful wire bristles, and it uses steam to clean your grill by absorbing water and releasing the steam when in contact with the hot grill grate. Forceful brushing and scrubbing is not used. The cleaning head of the brush is removable and can be washed in the dishwasher. The grill brush also features a durable handle and thick scraper made of brushed stainless steel.
4. Smart Meat Thermometer
Our Pick: MEATER Block Premium Wireless Smart Meat Thermometer
Amazon: amazon.co.uk
Official site: meater.com
All raw meats can carry harmful bacteria.
That’s why it’s crucial it’s properly cooked. This is where a meat thermometer comes in handy. Using a meat thermometer is the only reliable way to tell when your meat is done. There are thousands of meat thermometers on the market, but MEATER wireless smart meat thermometers are among the best meat thermometers. And, most importantly, they are fun to use!
Our favourite is the MEATER Block. The set includes 4 probes which you insert into the meat and a charger block with a built-in WiFi repeater. The smart thermometer features a Standalone Mode — an OLED display and speakers — which can be used if you want to cook without using the app.
How does it work? (If you use the app; not necessarily)
- Stick the probe into the meat. Make sure the probe is placed in the thickest part of the meat.
- Automatic notifications will let you know when to remove the meat from heat.
Yeah, it really is that simple.
Apart from that, the app knows temperatures and cooking times for all cuts of meat. It also allows you to select desired level of doneness. No guess work. The app shows progress and real-time graph of internal temperatures of your meat. All of that makes it one of the most unique barbecue gifts.
The probes are made with food grade stainless steel and are dishwasher safe. Check out the MEATER YouTube channel to learn more.
My BBQ Table set
5. Meat Shredding Claws
Our Pick: DALSTRONG Meat Shredding Claws
Amazon: amazon.co.uk
Official site: dalstrong.co.uk
There are plenty of budget meat claws you can choose from.
But if you are looking for premium meat claws, and, also, cool gifts for grilling, our absolute favourite is the durable DALSTRONG meat shredding claw set. These meat claws are expertly crafted out of tempered stainless steel and feature a durable, heat-resistant handles.
Handling and shredding hot meat can be messy. It can also be dangerous unless you are using special utensils called “meat claws”. Meat claws are claw-like tools which are used to safely handle, shred and carve hot meat. Shredding the meat with meat claws is faster, safer and more effective than with knife and fork.
Use one meat claw to hold a piece of meat in place, and the other — to carve or shred it. Or, use both claws to transfer hot and heavy cuts of meat from grill to plate. You can use meat claws to slice large fruit like watermelons or melons, or use them for tossing salads.
Do not forget that meat claws are sharp, so handle with care.
6. Stainless Steel Grilling Kit
Our Pick: Cuisinart CGS-5020 Deluxe Grill Set
Amazon: amazon.co.uk
Official site: cuisinart.com
Grills, especially charcoal grills, can get very hot.
Hence, one of the most popular tips for safe grilling is to use special accessories with long handles. The most popular grilling tools are: barbecue skewers, a barbecue fork, steel tongs, a BBQ spatula, a silicone basting brush, a BBQ multi-tool, a meat injector and a meat thermometer.
Rather than buying grilling tools by the piece, opt for a grilling tool set. Thus you’ll never be without the right utensil for the job. One of our favourite grilling tool sets is the Cuisinart Deluxe Grill Set. It’s a 20-piece set which includes 5 BBQ skewers, a spatula, grill tongs, a silicone basting brush, 8 corn holders, cleaning brush, replacement brush head, and digital temperature fork with an alarm.
The set comes in an aluminum storage case.
7. Heat Resistant Gloves
Our Pick: MOUNTAIN GRILLERS BBQ Heat Resistant Gloves
Amazon: amazon.co.uk
Official site: mountaingrillers.com
As you know, charcoal grills can get very hot.
To protect yourself from the heat and flames, wear heat resistant gloves when cooking. Also you will be handling hot food, pots and pans. Heat resistant gloves will come in handy.
The Mountain Grillers BBQ gloves are among our favourites.
These are durable, heat resistant gloves, with a slip resistant, textured surface. The gloves have a good level of heat resistance. You can handle hot meat without getting burnt. As the gloves have a slip resistant surface, you can be sure your meat won’t end up on the floor. And most importantly, you will make your BBQ lover friend happy without breaking your bank (if you are looking for a present for a friend).
The Mountain Grillers BBQ gloves are a good budget BBQ gift idea.
8. Leather Culinary Apron
Our Pick: Leaseek Heavy-Duty Leather Multifunctional Apron
Amazon: amazon.co.uk
Culinary apron is a must when cooking a lot.
And leather cooking aprons are one of the best options for BBQ enthusiasts. Not only they look cool and stylish, but also they protect the clothes from flame and spatter really well. One of out favourites is the Leaseek Heavy-Duty Leather Apron.
It is made of heavy duty split cowhide leather and sewn with heat resistant thread. It has 6 pockets for tools and accessories. What we like the most about this apron is that it is versatile. You can use it not only when grilling, but also in the kitchen and even in the workshop. One apron for so many tasks!
Finding interesting gifts for BBQ enthusiasts can be difficult. We hope this article will help you to find the best BBQ gifts for your friend (or yourself)!
Let’s talk about charcoal grilling safety.
Charcoal grills are simple, easy to use and offer great value for money. Not without a reason they are so wildly popular around the world. Apart from that they burn hotter than gas grills. For many the latter is one their favorite things about using charcoal — the heat, but it also comes with its own risks. That’s why it’s important to learn the charcoal grilling basics well.
So, you know what to do and what not when grilling on charcoal.
Charcoal Grilling Safety Tips
Make the most of grilling on charcoal by following these basic precautions.
Here are the dos and don’ts of charcoal grilling safety.
1. Choose a Safe Location for Your Grill
The most important thing is to choose the right place.
The grill must be placed on a flat and stable base to prevent it from tipping over. Also, make sure that the grill is not too close to a fence, trees, buildings or other structures, so you don’t start a fire.
2. Preheat Your Grill Well (And a Little More)
Our number two tip on charcoal grill safety.
Preheating a charcoal grill mostly takes at least 15 minutes.
If it’s a big grill and you are lighting charcoal without lighter fluid, it will take more time. In fact, it’s one of the most popular rookie charcoal grilling mistakes — putting food on the grill too soon, and regretting it afterwards. Don’t rush it! How can you tell when the charcoal grill is ready for cooking? It’s easy. When most of the charcoal has turned white/grey, charcoal is ready for cooking.
It’s especially important if you are using lighter fluid to start a grill. You want the fumes from the lighter fluid to be all gone — so your food doesn’t taste or smell of it.
3. Keep Children Away
Children are curious about everything around them.
They are excited to try new things, and grills and grilling accessories will definitely spark a desire to get involved in the process, at least for some of them. But grills can be very dangerous. Therefore, children must be supervised at all times, to avoid injuries and burns.
Keep pets away from the grill, too.
4. Put the Lighter Fluid Away
Don’t leave it near the grill — it’s dangerous.
Write it on the top of your BBQ safety checklist.
5. Get the Right Tools for Grilling
Because coal bbqs get very, very hot.
Charcoal burns hotter than gas. That’s one of the main reasons people choose charcoal grills, and it’s also one of the main reasons to be extra cautious when getting ready for grilling on charcoal. Use special, long-handled tools made specifically for cooking on the grill. If you don’t have such tools, it’s better to buy them in advance.
Remember about this next time you’ll plan to cook with charcoal.
6. Don’t Use Pans or Pots With Plastic Handles
And be careful when using accessories with plastic coated handles.
The reason behind this is the same — heat. A charcoal grill gets and stays very hot for long time, and it may melt the plastic, especially if you leave it unattended. It’s just too easy to leave the pot or pan in the “wrong angle”. We also wouldn’t suggest to use a moka pot on a charcoal grill. Better make your breakfast coffee in a small pot instead. Let it simmer for a better, stronger taste.
7. Don’t Cook on Open Fire
You don’t need open fire to cook.
Once the charcoal is ready for cooking, it turns either all white or grey, and stops smoking. It can stay like this for hours, burning slowly from the inside, and without a visible flame. If there’s open fire, chances are you are starting it too soon, so better wait a bit longer.
8. Don’t Grill Too Much of Meat at Once
Especially if it’s a fatty meat you’re cooking.
Why? Because too much fat dripping on coals are highly likely to cause flare-ups, and that can result in your meal being turned into toast. Take it slowly instead, and better cook something else at the same time on the sides, or just leave some empty space.
9. Use a Meat Thermometer
It’s both safer and it also makes cooking easier.
That’s the only way to be sure that the meat has been heated to the right temperature to kill all harmful bacteria, and to simply know that the meat is ready. Don’t risk, and just buy yourself a grilling thermometer. Don’t forget to clean the thermometer before and after handling raw meat, poultry and seafood. The same stands true for other tools you’re using with raw meat.
A quality meat thermometer can also be a great gift for BBQ lovers.
10. Keep Your Grill Clean
Flare ups, burned food, food sticking to the grate.
All of that is annoying, and all of that is avoidable when you do take care of your grill. Do a simple and quick clean up of the grill grate after every grilling session, and you’ll see a difference right away. Of course, it isn’t a magical solution, and it won’t protect you against all mishaps, but it does make your odds of having a great cooking experience better.
Empty the grill of all ash once in a while as well. Don’t forget that once in a while every barbecue grill needs a deep cleaning — once or twice a season mostly is enough.
See also: How to Clean a Charcoal Grill?
For more tips see our Charcoal Grilling 101.
Happy grilling! If you have something to add, send us your BBQ safety tips and tricks!
How long does charcoal last?
How long do charcoal briquettes last?
It’s not a small thing, not if you’re hosting a barbecue party. You don’t want to run out of charcoal in the middle of it, with food only half-ready. Bad planning is one of the most popular rookie grilling mistakes, after all. It’s one of those things you want to avoid when grilling on charcoal.
So, how long does charcoal take to burn out?
How Long Does Charcoal Last?
It can be anything from 1 hour to up to 5 hours, or more.
It depends from the grill, the amount and type of charcoal used and several other factors, among which is outside temperature, wind and the material of your grill. All of it can influence the burn time.
With My BBQ Table grills it’s around 5 hours.
That’s with a single 2-kilo pack of charcoal briquettes and about the same amount of firewood (firewood is used to start a grill). With a basic box or bowl grill without a lid, most likely you’ll get some 2 hours of grilling. That’s because of faster burning and less coal, as mostly they are smaller and not as protected from the wind. If you’ll be using regular lump charcoal, take into account that it also burns faster than charcoal briquettes.
How to Keep Charcoal Burning Longer?
First of all, choose long burning charcoal.
At My BBQ Table we use charcoal briquettes. They are a tiny bit harder to ignite, which isn’t a problem at all once you’ve done it a couple of times, but other than that they make things so much easier, as you can truly enjoy your time instead of worrying about the grill.
A 2-kilo pack of briquettes is enough for around 5 hours.
To keep it going longer, add a few pieces every now and then.
Does Charcoal Go Bad?
Does charcoal get old?
Not really, as long as you store them in the right conditions. Keep them in an air-tight container, and store the container in a cool, dry place. One thing you want to avoid the most is moisture. Charcoal briquettes can absorb moisture from the atmosphere, hence the need for air-tight container.
What if your briquettes get wet?
You should try and dry them, or otherwise it will be problematic or impossible to light them. It’s possible to dry charcoal briquettes in the sun.
Cooking on My BBQ Table
When Is Charcoal Ready to Cook On?
Mostly it’s after some 15 – 30 minutes.
It’s when most of the charcoal has already turned white/grey, is very, very hot but isn’t smoking anymore. This is when a BBQ grill is ready for cooking. If you’re starting a grill without lighter fluid, it will take longer.
For more tips see our Charcoal Grilling 101.
Read more: When Is Charcoal Ready to Cook On?
When is charcoal ready to cook on?
How long does it take for charcoal to be ready?
How to tell when charcoal is ready for cooking? Because it does take some time for a charcoal BBQ to be ready to cook on. You definitely shouldn’t start cooking right away. No matter how you’re starting a grill, with or without a lighter fluid, and especially if you are using a lighter fluid. It’s simply dangerous to do so, and it can also ruin the food you’re cooking.
When Is Charcoal Ready to Cook On?
It depends from the grill and the type of charcoal.
With My BBQ Table grills it takes around 15 – 20 minutes.
We use and recommend charcoal briquettes. As our experience shows, a 2-kg bag is the optimal amount of charcoal for a single grilling session of up 5 hours. We also use some 2 kilos of dry firewood or wood chips and lighter fluid to start a grill. We pour in the briquettes, cover them with firewood, lightly pour over the liquid, wait a minute and start the fire. In 15 – 20 minutes all the firewood is burned up, and the grill is ready for cooking.
If you’ll be starting a grill without a lighter fluid, plan more time.
How to Know When Charcoal Is Ready?
When is charcoal ready?
Simply wait until most of the charcoal has turned white/grey.
That’s when it’s already very hot on the outside (and ready for cooking), but still burning from the inside — even though it has stopped smoking. For the best experience, it’s actually better to wait for it to stop smoking. If you’re using firewood or wood chips for starting a fire, wait until all of it has burned up.
Cooking on My BBQ Table
How Long Does Charcoal Stay Hot?
It can be anything from 1 hour to up to 5 or more hours.
It depends from the grill and the amount of charcoal used.
With My BBQ Table grills and 2 kilos of charcoal briquettes, it’s around 5 hours. That’s 5 hours of grilling with a 2-kilo pack of charcoal briquettes and about the same amount of firewood. With a simple box or bowl grill without a lid, it’s gonna be less than that (because faster burning).
For more tips see our Charcoal Grilling 101.
Read more: How Long Does Charcoal Last?
There’s something very special about charcoal grilling.
And we love it. We love the cooking process, we love the taste, and we love cooking together with our family and friends. To help you start with charcoal grilling, we’re sharing these tips. It’s grilling on charcoal for beginners and those still thinking of trying it out. You can also call it the basics of charcoal grilling. We want to show you that there’s nothing difficult about charcoal grilling.
Here are some of our best charcoal grilling tips.
Our Best Charcoal Grilling Tips
Try to follow these things first, before learning of more advanced charcoal grilling tips and techniques. These are the very basics of charcoal grilling.
1. Don’t Buy the Cheapest Grill
Cheapest grills are a waste of money.
You may not be ready for a purchase as big as My BBQ Table sets, but surely don’t get yourself the cheapest grill. Think of your needs first, understand what is that that you want to get. Maybe you don’t even need a grill, and can simply choose food catering for that one or two occasions. However, if you do want your own charcoal grill, get the one that fulfills your needs.
2. Start Your Grill Properly
Most importantly — don’t rush it!
No matter how you start your charcoal grill, with or without lighter fluid, don’t rush it. Let all the firewood to burn up, if you’re using any. Preheat your charcoal grill well, until most of the coals are fully grey. This is how you know when charcoal is ready to cook on.
It’s especially important if you are using lighter fluid to start a grill. You want the fumes from the lighter fluid to be gone — so your food doesn’t taste or smell of it.
See also: Charcoal Grilling Safety Tips
3. Don’t Forget About Charcoal
Well, it’s obvious, but don’t forget about this.
A charcoal grill requires charcoal. How much charcoal do you need? How long does charcoal last? How long do charcoal briquettes last? It depends. With My BBQ Table grills a single 2-kilo pack of charcoal briquettes and about the same amount of firewood is enough for up to 5 hours of grilling. We use firewood to start a grill. So, now you know approximately how much charcoal to use when grilling. If you’ll be using regular lump charcoal, take into account that it burns faster than charcoal briquettes — mostly you’ll need at least twice as much of it.
4. Prepare for the Cooking
Charcoal burns very hot, don’t forget about this.
Cooking on a charcoal grill isn’t the same as cooking in your kitchen. Once you’ve started it, and the coals are going and starting to grey, there’s no way to slow it down. You’ll be cooking now, and at the temperature you have. You can’t turn off the grill for 5 minutes to do some extra preparations. Everything has to be prepared in advance.
5. Planning Matters
Preheating a charcoal grill takes time.
With most small and medium-size charcoal grills it takes between 15 to 30 minutes. This means that you have to make sure you start your grill some 30 minutes before the party starts. That’s around an hour before you plan your food to be ready (depending on what you’ll be cooking). You can cook almost anything on a charcoal grill.

Cooking on My BBQ Table grill
6. Control the Heat
No, there is no switch for that.
At the same time it doesn’t mean you can’t control it. You can. If you divide all coals into two zones, with more coals on one side and fewer or none on the other side. Use the hot side for all the cooking and cooler side for gentle cooking or to keep your food warm.
7. Prepare the Food Properly
If it’s meat, let it warm up a bit.
Let it sit at room temperature before grilling, and don’t forget to season it before grilling. The same stands true when charcoal grilling fish. If the meat is covered in marinade, wipe off the excess marinade before cooking to prevent flare-ups. Keep just a little marinade on the meat to enhance flavour.
If it’s vegetables, don’t cut them too thin, or be extra cautious when cooking. Otherwise they will burn the moment you take your eyes off of them.
8. Be Careful With Sweet Sauces
Don’t add them too early, or you’ll get your food burnt.
To avoid this, add the sauce towards the end of cooking.
9. Clean the Grate
Doing a light clean up every single time goes a long way.
Better do it soon after you’ve finished cooking. It’s easier to loosen the bits of food when the grate is still warm. If you don’t have a grill brush, take an onion, cut it in half, and use it for cleaning. Wiping the grate with an onion, makes it much easier to clean it, by loosening stuck-on bits of food.
It’s not that hard to clean a charcoal grill.
10. Enjoy the Process
That’s the best part about outdoor cooking.
The process itself, you being together with your loved ones and friends, enjoying food and spending time together, that’s what matters the most. So even if you forget about something mentioned earlier, don’t forget about this one. Enjoy it!
For more tips see our Charcoal grilling 101.
Garden barbecue parties, friends and family all being together.
The taste and the smell of freshly cooked meat and vegetables straight off the charcoal BBQ. There’s something very special about all of that, something to cherish and yearn for. If this is also something that you would like to try out, then this a guide for you. That’s charcoal grilling for beginners and those still thinking of trying it out, or in other words — charcoal grilling 101.
Basics of grilling and the best tips on charcoal grilling in a single guide.
Save this guide for later, if you don’t own a grill just yet.
Charcoal Grilling 101: Basics of Grilling
Choosing the right fuel, lighting the charcoal, cooking yourself a delicious meal and cleaning the grill quickly and easily — that’s charcoal grilling 101.
1. Grill Types
There are several types of grills available.
There are gas grills, charcoal grills, pellet grills, infrared grills, electric grills and hybrid barbecue grills, to name a few of the most popular options. Each one of these grills have their own characteristics and aspects of use.
Gas and electric grills are known for their ease of use. They’re easy to light and it’s very easy to control the temperature. Also gas grills heat up quickly and require little cleanup. There are also countertop electric grills which are perfect for indoor use (can be used in an apartment).
Charcoal grills, however, are known for versatility. You can cook almost anything on a charcoal grill. They are also very easy to install and provide a unique smoky flavour to your foods. The latter being one of the main reasons why people choose charcoal over gas. Charcoal grills are less complicated than gas grills or electric grills, thus they are also significantly cheaper.
With charcoal grills you get a much better product for the same price.
2. Why Choose a Charcoal grill?
Just in case you still haven’t decided.
As with everything else, charcoal grills have both advantages and disadvantages. The reason why so many choose a charcoal grill is the signature smoky flavour charcoal grills provide.
Other reasons why to choose a charcoal grill:
- Charcoal burns hotter than gas;
- It’s safer as there’s no open flame, only glowing embers;
- You get more for your money;
- Charcoal grills are simpler, and simple design means simpler use and maintenance.
2.1 Why Choose My BBQ Table?
There are many reasons to love My BBQ Table sets.
It’s one of the best gifts for BBQ lovers that you can buy online.
First of all, thanks to the smart design of My BBQ Table tables, everyone sitting at the table can cook their own food. Secondly, the grill is large enough to cook several different types of foods all at the same time — meat, fish, vegetables, omelette (using a frying pan) and even a pizza. Last but not least, it makes every occasion even more fun for everyone, everything from Sunday brunches with family to bbq parties with friends.
Choosing the best grill for your needs is just as important as learning how to cook with charcoal.
See also: 7 Reasons to Love My BBQ Table
3. Choosing the Right Fuel for Your Charcoal Grill
What’s the best charcoal for grilling?
And, again there are several options. Regular lump charcoal and charcoal briquettes are two of the most popular options, and we recommend charcoal briquettes in combination with wood chips / firewood (used only to start a grill).
Charcoal briquettes burn longer and maintain a steady temperature for a longer period of time than regular lump charcoal. True, they are a harder to ignite, but at the same time require no extra work from you afterwards. All My BBQ Table sets come with a free pack of charcoal briquettes and firewood, so you can try them out for yourself.
As our experience with My BBQ Table shows, a 2-kg bag of charcoal briquettes and a 2-kg bag of firewood is enough for a 5-hour long grilling session.
4. How to Start a Charcoal Grill?
There are several ways how to start a charcoal grill.
One of the easiest ways is by using a lighter fluid. It’s extremely easy, fast, efficient, and when done properly also doesn’t affect neither taste nor smell of the food. Just pour in the charcoal or briquettes, cover them with some firewood or wood chips, pour over with a little bit of lighter fluid and light it a couple of minutes later.
Some BBQ enthusiasts do not recommend using lighter fluid for barbecue, because of the taste it might give and the chemicals it consists of. The key here is to let the fire to go on for at least 15 – 20 minutes, for all the firewood to burn up, and accordingly for the fumes of the lighter fluid to dissolve as well. The wait is also necessary for the charcoal to become ready to be cooked on.
And, of course, don’t use too much of the fluid.
It’s also possible to light charcoal without lighter fluid.
4.1 How to Light Charcoal Without Lighter Fluid?
Most people choose to light charcoal with lighter fluid.
It shouldn’t come as a surprise, as it’s extremely easy, fast and efficient. When done properly, it’s also doesn’t affect the taste and overall is a great way to start a charcoal grill. But what if you don’t have a lighter fluid or if don’t want to use it? How to light charcoal without lighter fluid?
There are several ways you can light charcoal without lighter fluid.
It may require more patience or time, but it’s absolutely doable.
You can use:
- electric charcoal grill fire starter;
- chimney starter;
- fireplace lighter cubes;
- paper and dry sticks.
5. When Is Charcoal Ready to Cook On?
How long does it take for charcoal to be ready?
It depends on the grill and the type of charcoal.
Simply wait until all the firewood has burned up and most of the charcoal has turned either white or grey. With My BBQ Table grills, and using lighter fluid, it takes around 15 – 20 minutes. After that the grill is ready for cooking. If you’ll be starting a grill without a lighter fluid, plan more time.
5.1. How Long Does Charcoal Stay Hot?
It can be anything from 1 hour to up to 5 or more hours.
It depends on the grill, the amount of charcoal used and several other factors. If you want to take the easiest path, choose charcoal briquettes — they burn significantly longer, and require little to no extra work once the coals are ready to be cooked on. Accordingly your grill will stay hot longer.
6. Mastering Two-Zone Grilling
It’s easy, and it will allow you to control the heat.
It’s also one of our top charcoal BBQ tips. Arrange the hot coals on one side of the grill only. Leave the other side coal free. This will provide extremely hot temperatures on one side and cooler temperatures on the other. Use the hot side for searing and fast cooking, the one without the coals — for slower, indirect cooking. Use it to cook foods through after searing. Even though there are no coals underneath, it’s still hot and food will cook there, just not as fast as on the other side.
7. How to Prevent Flare-ups?
Follow these easy steps to prevent flare-ups:
- Remove excess fat, sauces or marinade before BBQ grilling;
- Don’t oil the grate, coat your food with a thin layer of oil instead;
- Don’t over-oil your food;
- Avoid wind;
- Leave one side of the grill coal free, so you can move your food there in case of flare-ups;
- Do a light clean-up after every grilling session. Clean your grill to remove food residue and old grease.
See also: Charcoal Grilling Safety Tips
7.1 How to Put Out a Flare-Up?
Move the dripping food to the coal free part of the grill and let the flare-up subside.
Close the lid to cut off the oxygen (if there is a lid).
Never use water to put out a fire!
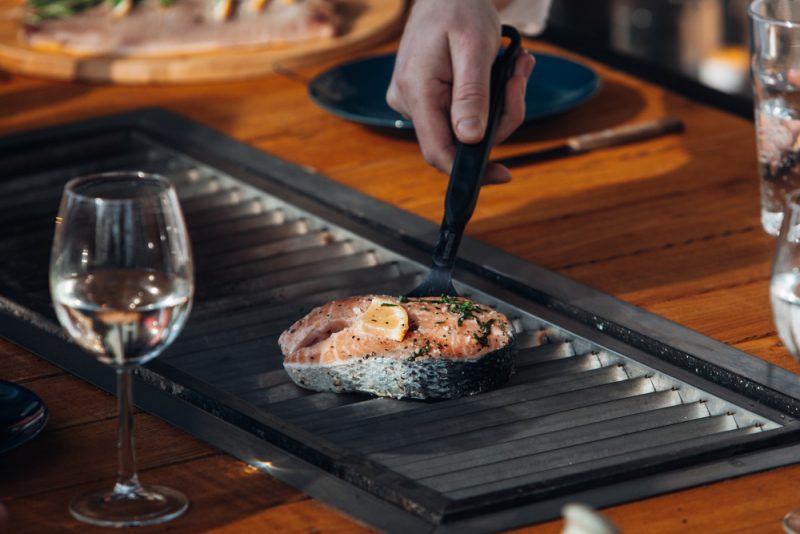
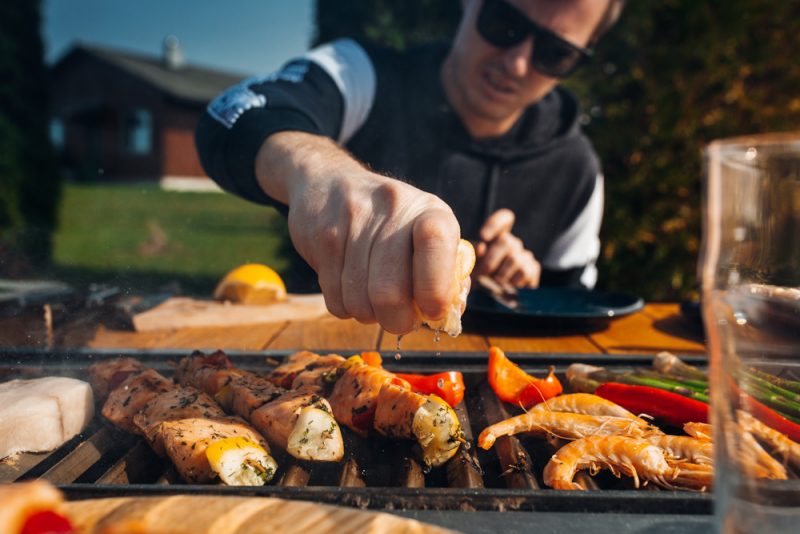
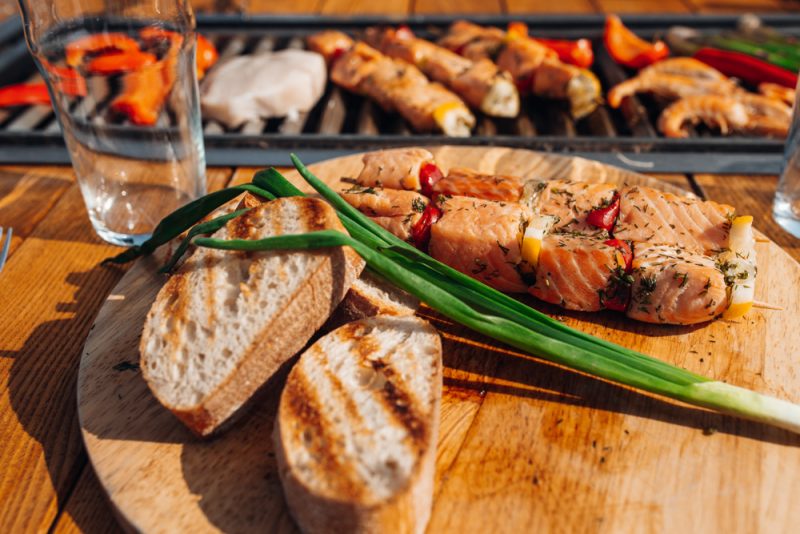
Cooking fish on a charcoal grill
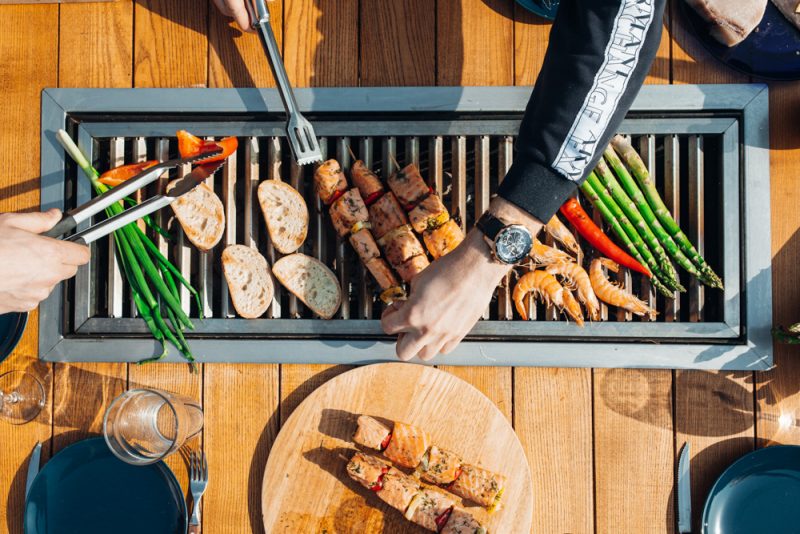
8. What Can You Cook on a Charcoal Grill?
What you can cook on My BBQ Table grills? Just about anything!
Charcoal grills are well-known for versatility. You can use one for anything from breakfast with family to full-on BBQ party with friends, cooking anything from steaks and burgers to fruits and light veggie snacks. Meat and seafood cooked on a charcoal grill will taste great —grilling over charcoal gives the meat and fish that wonderful smoky flavour.
Fish, prawns, lobster, crab and other seafood can be easily cooked on a grill. The best fish for grilling? Tuna, salmon, cod, sea bass and red snapper are all great options. Choose which type of fish cut you want to prepare — fillet, steak or whole fish.
You can also grill vegetables on a charcoal grill.
Here are just a few ideas:
- Grilled corn on the cob
- Grilled avocado with tomatoes and herbs
- Grilled cabbage
- Grilled baby potatoes with rosemary
- Grilled whole cauliflower
- Grilled glazed pineapple
- Grilled figs with crème fraiche and honey
- Grilled bananas with chocolate coating (you can melt chocolate on the grill, in a small saucepan)
You can even grill fruit such as pineapples, cantaloupes, oranges, peaches, bananas and even strawberries. As long as they’re firm and not overripe. Just spray a little coconut oil on them before grilling and drizzle fruits with maple syrup or honey at the end.
It may surprise you, but you can make a pizza on a grill.
Cooking pizza on charcoal grill is, actually, very easy. Especially if you’re going to use a ready made pizza base.
Put the dough or the pizza base on the pan or directly on the grill grates (they must be greased) cook it on both sides. Take it off, cover with a little bit of olive oil, then cover it with tomato puree. Sprinkle on your toppings, ending with cheese. If you use meat, it must be pre-cooked. Finish cooking on the grill or pan.
What about vegetarian food?
There are countless charcoal grilling recipes for vegetarians. Grill vegetables for salads. Make veggie burgers or plant based Beyond burgers. Make a grilled cheese sandwich — grill the bread on both sides, and cheese separately from the bread, then assemble the sandwich.
8.1 What Do I Put On a Skewer?
Just about anything can be put on a skewer.
Different types of meat and fish, pieces of meat with vegetable chunks between them, or only vegetables. Speaking of vegetables, we recommend you to cut vegetables into large chunks. So they are seared on the outside but don’t go too soft on the inside. If you cut your veggies too thin, they will easily burn.
What if you don’t have skewers?
What can be used as substitutes for skewers?
Lemongrass stalks make excellent substitutes for skewers. You can use them for chicken, shrimp or fish. You can also put chunks of meat on fresh rosemary, if you would like a hint of rosemary. Put red meat and fruit on cinnamon sticks.
9. Clean the Grill Grate After Every Use
The grate is the part of the grill that you place your food on.
That’s the only part of the grill that comes in contact with the food. Hence it’s important to keep it clean, that’s BBQ 101. You don’t have to clean the whole grill after every use, but we would recommend you to take care of the grate. Otherwise your food will stick to the food left from the last grilling session, and you don’t want that to happen.
10. How to Clean a Charcoal Grill?
Brush the grate with a grill brush.
Do it soon after you’ve finished cooking. Then let your grill cool down and brush the grate one more time to get rid of the last bits of food that may still be there. Wash the grate, if necessary. It’s easier to do it while it’s still warm. You can use a special cleaner or make your own from water and vinegar (read more here). Spray the grates with the cleaner. Let it sit for some 10 – 15 minutes. Afterwards clean it off with a cloth or sponge.
Empty the grill of all ash once in a while.
Once in a while every barbecue grill needs a deep cleaning.
What if the grill is clean but food still sticks?
Rub a little oil on the grates.
See also: How to Clean a Charcoal Grill?
11. What to Do With Charcoal After Grilling?
If you use additive-free charcoal, you can use it as fertiliser.
The ash contains potassium carbonate, which is nutritious for plants.
If you are using charcoal briquettes which contain additives, throw them in the rubbish bin after use. They can’t be used as a fertiliser, as they are not fully natural. Just make sure they are completely cool when you throw them out.
12. How to Tell if Meat Is Cooked?
How to tell if chicken is done?
How to tell if salmon is done?
Use a thermometer when cooking meat.
That’s the easiest and best way to tell the meat is cooked properly. You can’t tell if the meat is cooked or no just by cutting into it or poking it, especially if you aren’t experienced with barbecuing. Google the type meat you’ll be cooking to learn what’s the right temperature for it.
When using a meat thermometer, clean it in between uses to avoid cross-contamination in case the meat has not yet reached a safe temperature when you were checking it.
13. How to Avoid Cross-Contamination?
You’d want to avoid that!
Cross-contamination can occur when you use tools (tongs, basting brushes, meat thermometer, etc.) on raw meat without thoroughly washing them when touching cooked meat. Please, try to avoid that, and you’ll have a better chance at avoiding cross contamination while grilling.
14. Accessories for Grilling
Get them for yourself or your BBQ loving friend.
Here’s a list of some of the most popular accessories for grilling we would recommend you to use. Add them to your BBQ shopping list, and have fun on your next BBQ party.
- Stainless steels barbecue skewers — a must for every grilling enthusiast;
- Electric charcoal grill fire starter — an easy and fast way to start your grill;
- Meat thermometer — fast and accurate way to tell if the meat is cooked;
- Grill brush — a must have for all grill owners;
- Grilling tool set that include tools such as barbecue fork, steel tongs, spatulas, silicone basting brush. Rather than buying grilling tools by the piece, opt for a grilling tool set. Thus you’ll never be without the right utensil for the job;
- BBQ multi-tool — a good alternative to a grilling tool set, one handy tool which often includes: meat fork, spatula, tong, silicone basting brush;
- Grilling pan — so that vegetables and other small food items stay in place while grilling and do not slip through the grill grates;
- Grill fish basket — keeps your fish and other seafood from sticking to the grates of the grill (don’t forget to oil the fish basket);
- Hinged grill basket — keeps vegetables contained, you can easily cook them from both sides just by flipping the basket;
- Meat injector — for injecting marinades into the meats for a better flavour;
- Meat claws — for handling, shredding and carving meat;
- Kabob grilling baskets — steel-wire, non-stick baskets for cooking kabobs without a skewer.
Happy grilling!
It may sound difficult and too messy at first.
But there’s nothing difficult about using a charcoal BBQ grill.
As soon as you learn the basics, and aren’t making any of the rookie mistakes anymore, you’ll be having a perfect barbecue lunch, branch or BBQ party every single time. If you’re new to grilling on charcoal, or aren’t sure if you’re doing it the right way, see the list below. Here we’ve listed some of the most common mistakes when grilling on charcoal.
Avoid these mistakes, and have a great meal every single time.
What to Avoid When Grilling on Charcoal
Are you a bit anxious about your first BBQ party? Afraid that you’ll ruin it?
Don’t worry! We are here to help.
1. You Don’t Preheat Your Grill for Long Enough
Some people start cooking right away — don’t do it.
Follow our guide on how to start a charcoal grill, and always let your grill run for at least 15 – 20 minutes before you start cooking food on it. You have to wait when the coals are fully grey, and if there’s some firewood as well — until it’s all burned up.
It’s simply dangerous to start cooking right away, while the coals are still burning. The oil and fat on your meat may cause flare-ups which you would want to avoid at all costs. A flare-up is an intense burst of a flame, caused by oil or fat dripping off the meat or other food and hitting the coals, causing a fire. It can pose a direct threat to the food on the grill.
Another reason to wait — you want the fumes from the lighter fluid to be gone.
You don’t want your food taste or smell of lighter fluid.
See also: Charcoal Grilling Safety Tips
2. Bad Planning
Don’t forget that preheating your charcoal grill takes time.
With most medium-size charcoal grills it takes between 15 to 30 minutes. This means that you have to make sure you start your grill some 30 minutes before the party starts, or around an hour or even more before you plan your food to be ready (depending on what you’ll be cooking).
There are plenty of things you can cook on a charcoal grill.
3. Cooking for Too Long
Don’t forget that charcoal burns hotter than gas.
For many it’s one of the top reasons to choose a charcoal grill.
This means, you don’t need to cook, for example, meat as long as you would cook it on a gas grill. Yes, you may not see a flame or anything, but it doesn’t mean that it isn’t hot — in fact, it’s most likely very hot. So, be cautious when cooking, and don’t overcook your meal.
4. Not Controlling the Heat
You can’t dial it down with a charcoal grill, but you can still control it.
All you have to do is to divide your grill into two zones — one with coals and one without, or with a very thin layer of coals. Use the hot side of the grill for searing, and the cooler side for gentle cooking or to keep your food warm longer.
5. Forgetting to Clean the Grill Grate After Every Use
The grate is the part of the grill that you place food on.
That’s the only part of the grill that comes in contact with the food, hence it’s important to keep it clean and well-kept. You don’t have to clean the whole grill after every use, but we would recommend you to take care of the grate. Otherwise your food will stick to the food left from the last grilling session, and you don’t want that to happen.
Learn how to clean a charcoal grill the right way.

My BBQ Table
6. You Are Adding the Barbecue Sauce Too Early
You coat your meats with sweet sauces too early, causing them to burn.
This gives your meats bitter taste, and there’s nothing you can do about it anymore. The burn sauce gives the meat black crust which has to be scraped off before eating.
To avoid this, add the sauce towards the end of cooking.
7. Not Preparing the Meat
First of all, let it warm up a bit.
It’s much better to let the meat sit at room temperature before grilling.
If you are cooking cold meat, it’ll take longer to heat up.
Secondly, don’t forget to season your meat before grilling.
Lastly, if the meat is covered in marinade, wipe off the excess marinade before cooking to prevent flare-ups. Keep just a little marinade on the meat to enhance flavour.
8. Not Using a Thermometer When Cooking Meat
Use a thermometer when cooking meat.
That’s the only way to tell the meat is cooked properly. You can’t tell if the meat is cooked or no just by cutting into it or poking it, especially if you aren’t experienced with barbecuing. Google the type meat you’ll be cooking to learn what’s the perfect temperature for it.
When using a meat thermometer, clean it in between uses to avoid cross-contamination in case the meat has not yet reached a safe temperature when you were checking it.
9. You Oil the Grates Too Much
And it causes your grill to flare up.
Instead of oiling the grates, it’s better to coat your food with a thin layer of oil. This will keep it from sticking to the grill and will also prevent flare-ups.
10. You Are Cutting the Vegetables Too Thin
Be careful when grilling very thin slices of vegetables.
Remember, charcoal grills are very hot, and it takes very little for your thinly sliced veggies to burn. Instead, use thicker slices of veggies, and put them in the corner of the grill with less (or no) coals, or just be extra careful when doing that.
11. You Are Risking Cross Contamination
Cross-contamination can occur when you use tools (tongs, basting brushes, meat thermometer) on raw meat without thoroughly washing them when touching cooked meat.
You’d want to avoid that!
For more tips see our Charcoal Grilling 101.
Happy grilling!
Most of people choose to light charcoal with lighter fluid.
It shouldn’t come as a surprise, as it’s extremely easy, fast and efficient. When done properly, it’s also doesn’t affect the taste and overall is a great way to start a charcoal grill. But what if you don’t have a lighter fluid or if don’t want to use it? How to light charcoal without lighter fluid?
What’s the best substitute for lighter fluid?
How to Light Charcoal Without Lighter Fluid?
There are several ways you can light charcoal without fluid.
It may require more patience or time, but it’s absolutely doable.
1. Chimney Starter
It’s one of the most popular alternatives to lighter fluid.
If you have never heard of it, it’s basically a metal tube with a grate, and a holder. You fill it with charcoal or charcoal briquettes, and place paper or lighter cubes under it.
As paper or lighter cubes are burning they ignites the charcoal at the bottom of the tube, the heat builds up and the rest of the charcoal ignites. Some time later you take the chimney by its handle, and dump the burning charcoal into the grill. The latter is the hardest part, as by this time the chimney starter is very hot. Apart from that, it’s an easy and effective way to start a charcoal grill.
How to Light Charcoal Without Lighter Fluid or Chimney?
What if you don’t have a chimney starter?
How to start a charcoal grill without a chimney?
2. Lighter Wood or Firewood
It’s usually resin saturated, and ignites very quick.
Alternatively you can opt for dry firewood or wood chips, and use paper or lighter cubes to start a fire. A 2-kg bag of firewood should be enough for a 2-kg bag of charcoal briquettes. As our experience shows, one such a pack of charcoal briquettes and firewood is enough for a 5-hour long grilling session. With My BBQ Table sets we pour the briquettes first, and then cover them with firewood. Start the fire from several places at the same time.
In around 30 minutes your grill is ready for cooking.
3. Fire Starters (And Paper or Dry Sticks)
It’s a well-known charcoal lighter fluid substitute.
There are all kind of fire starters.
The most popular ones and the simplest ones are lighter cubes.
For the best and quickest result, you’ll also need some paper and / or wood. Speaking of the paper, what works the best are newspapers and cardboard egg crates. Instead of wood you can use wood chips or small and dry sticks. The key here is to build a fire that can keep on going long enough for at least some of the charcoal to be ignited. That’s the same with most other methods when you are lighting charcoal without lighter fluid.
Crumple up a few pieces of paper, and place it together with lighter cubes. Cover it with pieces of dry cardboard egg crates, if you have any. Next goes wood chips or sticks, and a few pieces of charcoal which will later ignite the rest. Start the fire and keep it going. When the charcoal starts smoking add some more charcoal.
Keep it going until all of charcoal are mostly covered in white ash.
In total it may take around an hour.
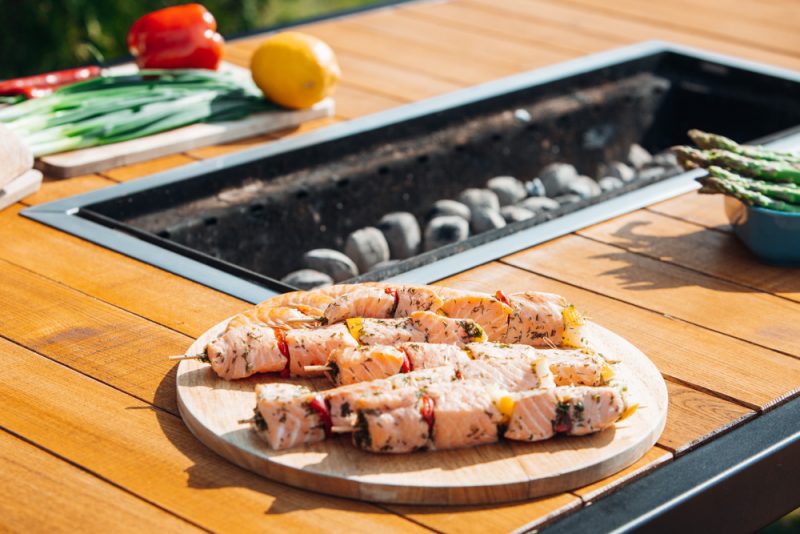
My BBQ Table
4. Paper and Vegetable Oil / Cooking Oil
How to light charcoal with cooking oil?
It isn’t going to be a fast process, but it works — you can light a charcoal grill with cooking oil. First, make a bed of paper balls, and put some charcoal on it. Then sprinkle the charcoal with vegetable oil, and start the fire. Keep the fire going at least until the charcoal starts smoking, longer is better. Add more paper if necessary.
Add some more charcoal once the first batch starts smoking.
Keep it going until all of charcoal are covered in white ash.
5. Electric Charcoal Grill Fire Starter
Unlike the rest, this doesn’t necessarily take more time than lighter fluid.
Depending on the model of the fire starter, it can be the same as effective and fast, and also simpler way to start a charcoal grill, as all it requires is a single device. The way these things works is they use super heated air to ignite the charcoal. You keep it very close to the coal, pointing to one spot, and wait.
With Looft Lighter the waiting is only around a minute.
The Looft Lighter is super cool.
It’s one of the best best gifts for BBQ lovers you can buy online.
For more tips see our Charcoal Grilling 101.
Happy grilling!
Taking BBQ to the next level by making it more social.
Making it more enjoyable for everyone involved. Making it easy for everyone to cook together. That has been our goal all along the journey of building this set, and now with My BBQ Table we’re bring it to you. It isn’t just a charcoal grill or a table with a built-in grill. It’s a one-of-a-kind social cooking experience, now available to everyone.
If you’re ready for something new and special then this is for you.
Here are 7 reasons to love My BBQ Table.
Reasons to Love My BBQ Table
Are you looking for a new grill?
Are you considering buying a new charcoal grill, and can’t decide which one? While traditional charcoal grills are great, My BBQ Table set is something completely different. It isn’t just a grill, but a whole experience. Read on to find out how it can change the way you grill.
1. You Can All Cook Together
Garden barbecue parties, friends and family all being together, the taste and the smell of freshly cooked meat and vegetables straight off the charcoal BBQ. There’s something very special about all of that, something to cherish and yearn for. Especially now, in the times when we are becoming more and more disconnected from each other.
However, with all the good memories there always has been this frustration.
Cooking itself rarely feels like a social interaction.
Because mostly, let’s admit that, there’s only one cook, all alone by the barbecue grill, cooking all the food for everyone. While the rest of the people are socialising in small groups or just awkwardly walking around while waiting for the meal to be ready.
With My BBQ Table you can all cook together.
Just like the Koreans have been doing for centuries already.
2. Everyone Can Cook Their Own Food
My BBQ Table is spacious enough for a group of friends or family.
The grill is right in the middle of the table, and you can cook whatever you want. You don’t need to sacrifice a chance to eat your favourite foods, just to make sure others are getting their favourite food.
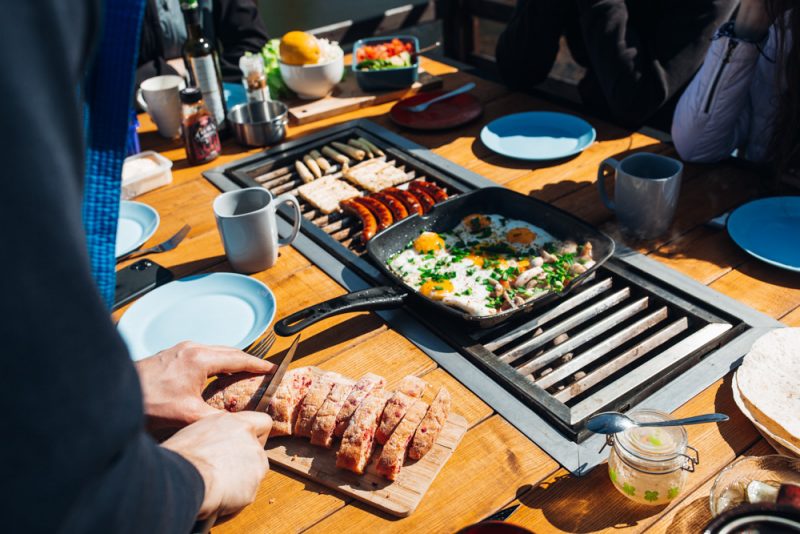
Place whatever meats would you like to cook in one corner of the grill. Put veggies, corn on the cob, mushrooms, tofu, veggie burgers, bread or other non-meat items in the other corner. And in the middle there is still space for a frying pan in which you can fry french fries, cook eggs or make an omelette.
3. Two in One — High Quality Dining Table and Grill
With My BBQ Table you get both a dining table and a BBQ grill.
The table comes with chairs, and can comfortably seat 8 people.
Designed and manufactured in the EU, it isn’t only a functional and elegant garden furniture set. It’s also a very sturdy set of the highest quality, made to look great both in your yard or on the terrace, in every setting. The set is made to last you years.
4. Great for Any Occasion
It’s designed to make every occasion even more fun for everyone.
Be it a child or an adult, everyone loves cooking together.
BBQ party, Sunday brunch, birthday party, small wedding party, breakfast, lunch, dinner, you name it. The set is suitable for so many occasions, and there are so many foods you cook on My BBQ Table.
5. Suitable for So Many Different Kinds of Food
For My BBQ Table sets we use charcoal grills.
And charcoal grills are well-known for their versatility — just about any food can be cooked on one. The grill is suitable both for cooking meat and vegetables. You can put a frying pan on the grill and use it to cook an omelette or fry an egg, or use a small pot to boil water and brew tea or coffee. It’s suitable for everything from lazy Sunday brunches with family to full-on BBQ parties with seafood, grilled pizzas and burgers.
The best part being the fact that the grill is large enough for everyone in your group to cook their favourite foods.
However, we wouldn’t suggest to use a moka pot, as well as pots and pans with plastic coated handles. The grill gets very hot, and it may melt the plastic.
6. It Offers Very High Heat
It’s a charcoal grill after all.
Charcoal burns hotter than gas, and charcoal grills reach a higher temperature than gas grills. If you want high heat, choose a charcoal grill over gas. If you love meat and you’re after the perfect sear, choose a charcoal grill. For many it’s one of the top reasons to choose a charcoal BBQ grill.
Also, the heat in charcoal barbecue is even. Remember, you can’t dial down the heat on the charcoal grill. But it doesn’t mean that you can’t control temperature. Leave areas without charcoal / briquettes to control the temperature.
7. The Amazing Smoke Flavour
True, cooking on a gas grill is more convenient than cooking on a charcoal grill. It’s the ease-of-use and speed that makes it convenient to use a gras grill. At the same time, grilling your food on charcoal feels so much more special, and that’s mostly due to the flavour.
Cooking on a charcoal grill will make your food more flavourful.
You simply can’t get the same taste with gas.
If you love this deep smoky flavour, choose a charcoal grill. And if you love cooking together, choose My BBQ Table, one of the best gifts for BBQ lovers that you can buy online.
Charcoal or a gas grill?
Why do we use a charcoal grill in My BBQ Table?
What are the main pros and cons of charcoal vs gas grill? First of all, for us it’s the taste. It’s the number one reason for us to use a charcoal grill, not a gas grill. We simply love the taste of freshly cooked barbecue, that smoky accent it gives to everything you cook over the charcoal. We aren’t the only ones, as it looks — otherwise you wouldn’t see so many articles on “how to get charcoal flavor on a gas grill” on the internet.
Learn more about the other reasons below.
Charcoal vs Gas Grill
Which is better — gas or charcoal grill?
While it’s mostly up to your personal preference, here we’ve listed some of the things we love about charcoal barbecue grilling and grills. Things that you may find helpful when thinking of upgrading or buying a new barbecue grill for your house. Or maybe when looking for a gift for your BBQ lover friends.
5 Reasons to Choose a Charcoal Grill
1. It Tastes Better
You simply can’t get the same taste with gas.
If you’re after that smoky flavour and an unparalleled crust, choose charcoal or wood. You can get the char marks, but there won’t be any special flavour when grilling with a gas grill or electric grill, no matter the brand or price. It just won’t be the same thing.
2. Charcoal Burns Hotter Than Gas
An important factor if you’re after the perfect sear.
If you’re a meat lover, you’ll notice the difference right away. This is also one of the reasons why food tastes so much different when cooked on charcoal than on a gas grill. And another win for charcoal in this gas vs charcoal grill battle.
3. It’s Safer (In Some Ways)
While charcoal burns way hotter than gas, it releases almost nothing except heat. All that’s necessary is for you to start your a charcoal grill properly, allowing for the charcoal to heat up properly before you start grilling anything. It requires some extra planning, but the result is definitely worth it.
No uncontrolled flare-ups, no open flame.
Learn more about charcoal grilling safety.
4. Charcoal Grills Are Cheaper
Charcoal grills are cheaper than gas grills.
Most of high quality gas grills are significantly more complicated, and cost more simply because of all the moving pieces inside the grill. At the same time, charcoal grills are much cheaper, and at the same price point — of much better quality. To put it simply, you get a better product for your money.
5. Charcoal Grills Are Simpler
Simpler design means simpler use and maintenance.
When the construction is very simple, and there are only a few parts, there are way less chances of anything going out of order. With few parts there are only a few reasons for a grill to break, most of which are avoidable with the right material choice and manufacturing techniques.
What is there not to love about a grill that’s easy to take care of.
Of course, there are also some negatives to charcoal grilling. It takes longer to get started and the deep cleaning is also messier, but for us the positives clearly outweigh the negatives. For us charcoal is a clear winner in the charcoal vs gas grill contest.
Happy grilling!
How to start a charcoal grill?
How to start My BBQ Table built-in charcoal grill?
As hard as it may seem at first, there’s nothing complicated about starting a charcoal grill. By making the grill removable, and including an additional stand, with My BBQ Table we’re taking the ease of use a step further. However, the same techniques may be applied to light other charcoal grills.
Let’s get that grill going!
How to Start a Charcoal Grill (My BBQ Table)?
First of all, make sure you have everything necessary.
You’ll need coal, some firewood or wood chips and lighter fluid.
1. Choosing the Right Fuel for Your Charcoal Grill
We recommend you to use charcoal briquettes instead of coal.
Charcoal briquettes burn longer and maintain a steady temperature for a longer period of time than regular lump charcoal. True, they are a harder to ignite, but at the same time require no extra work from you afterwards. All My BBQ Table sets come with a free pack of charcoal briquettes and firewood, so you can try them out for yourself.
As our experience shows, a 2-kg bag of charcoal briquettes and a 2-kg bag of firewood (to start a grill) is enough for a 5-hour long grilling session.
2. Preparing Your Barbecue Grill
My BBQ Table consists of a tabletop, and a removable grill section.
First, take off the grate. Next, take out the grill section out of the grill table and place it on its stand. Every set comes with a dedicated stand and removable handles for safe carrying. We’ve made it this way to ensure that you don’t damage the table while starting a fire, and for the well-being of everyone. Sitting by open fire would just be too hot and uncomfortable for people around the table.
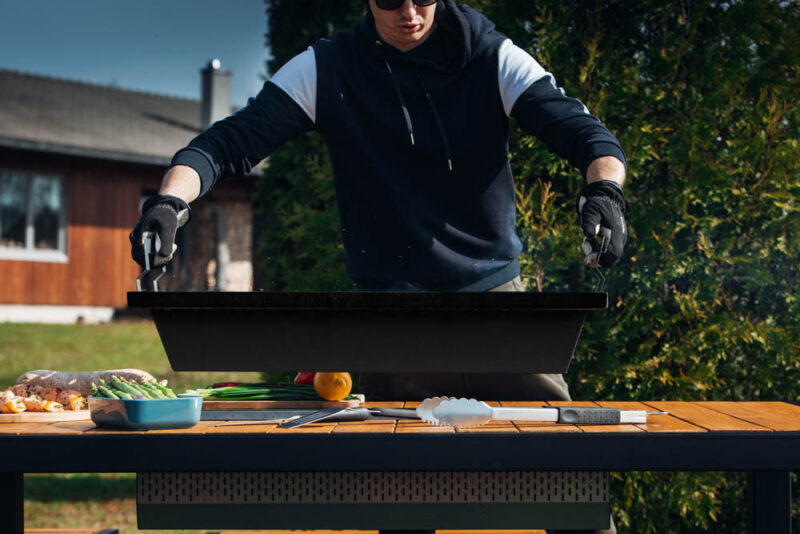
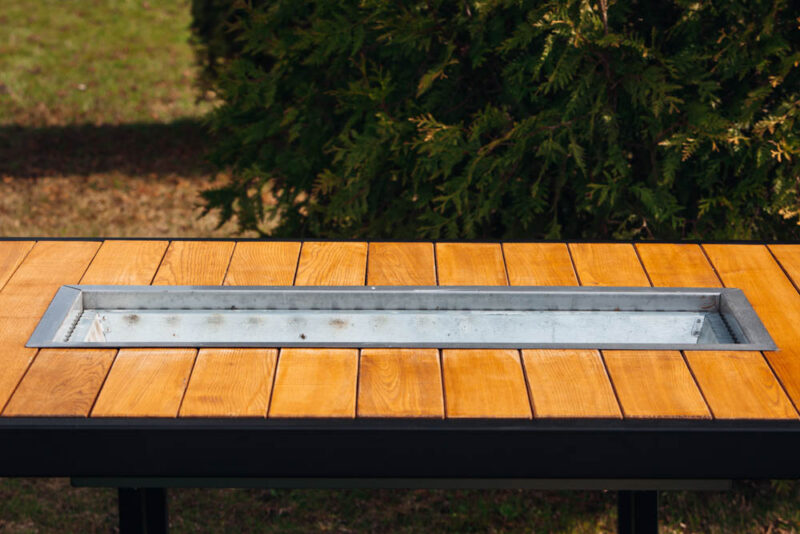
Now you can start a fire.
15 – 20 minutes later, you’ll return the grill to the table.
3. Starting a Charcoal Grill
So, you’ve taken off the grill grate from the grill and the grill of the grill table. You’ve put the grill part in the special stand, and the grill is now ready to use.
Pour in 2 kilos of charcoal briquettes.
A 2-kg bag of charcoal briquettes is the optimal amount.
Cover them with some firewood or wood chips.
Pour lighter fluid and light it.
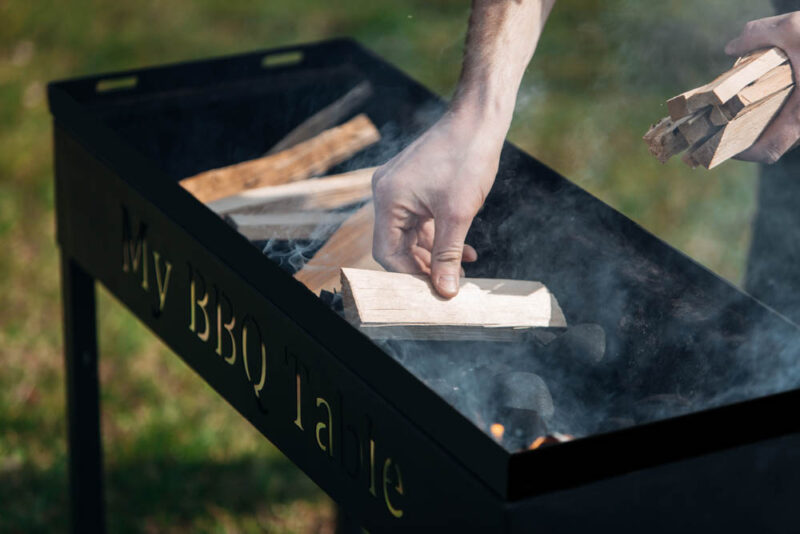
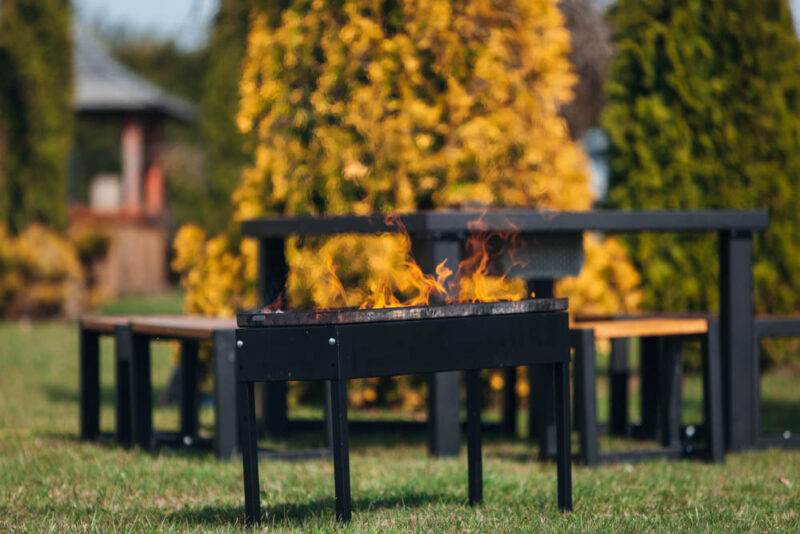
Some 15 – 20 minutes later, once all the firewood is burned up, the grill is ready for cooking and can be put back in the grill table. Take into account that it’s gonna be very hot at this moment. Use included special handles for carrying, and put on the grate only after you’ve placed the grill in the table.
To Use Lighter Fluid or Not?
It’s up to you to make this decision.
However, we believe that you can use it safely.
Some BBQ enthusiasts do not recommend using lighter fluid for barbecue, because of the taste it might give and the chemicals it consists of. But in this case, when the grill section is taken out, the fire is started outside the BBQ table, and when you aren’t rushing, we believe that it causes no danger. The key here is to let the fire to go on for these 15 – 20 minutes, for all the firewood to burn up, and accordingly for the fumes of the lighter fluid to dissolve. And, of course, don’t use too much of the fluid.
How to Light Charcoal Grill Without Lighter Fluid?
How to light charcoal without lighter fluid?
If you still don’t want to use lighter fluid, another great alternative are fireplace starter cubes. Place the charcoal at the bottom of the grill, and put wood chips on top of it. Put a few fireplace starter cubes among the wood chips, and light them. Once the wood chips are burning, they’ll heat up the charcoal briquettes.
Take into account that it will take at least 10 extra minutes.
For more tips see our Charcoal Grilling 101.
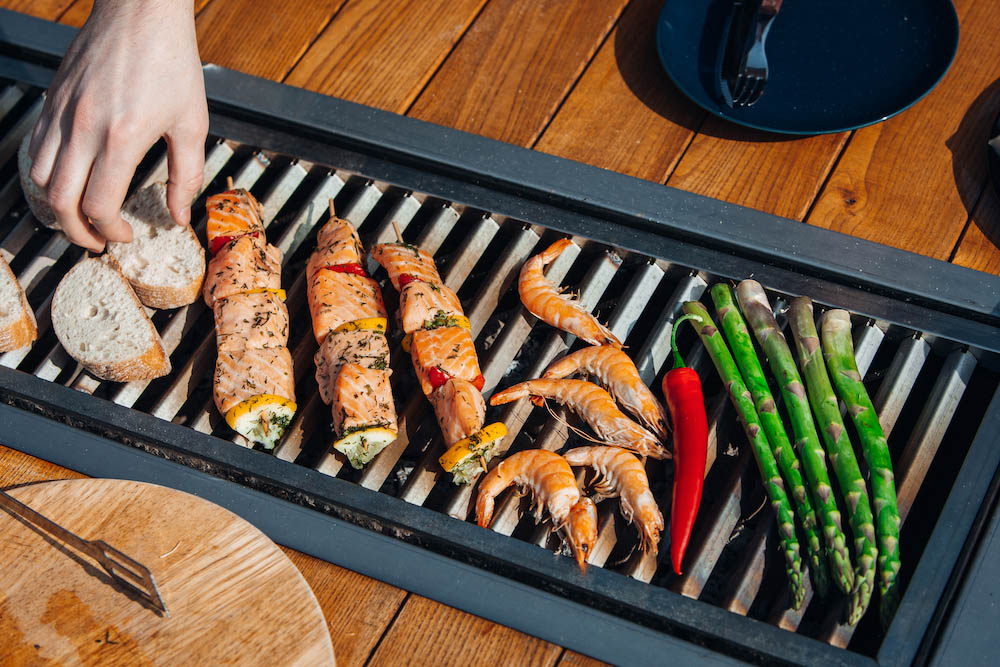
Read more: How to Light Charcoal Without Lighter Fluid
Happy grilling!
Craving for a grilled chicken sandwich?
Yes, you can make delicious sandwiches on the grill! Chicken grilled sandwiches are tasty, and a simple recipe for all the family to enjoy. So simple to make and they work great for breakfast, lunch or even dinner — everyone loves them.
Here is an easy grilled chicken sandwich recipe.
Grilled Chicken Sandwich Recipe
Learn how to make a delicious grilled chicken sandwich.
Ingredients (4 portions):
- 2 chicken breast fillets
- Chicken marinade of your choice
- 150g bacon
- 8 slices of bread
- 2 medium tomatoes, neatly sliced
- 2 avocados
- romaine lettuce
- dried or fresh herbs (coriander or parsley)
- BBQ sauce
Directions:
Cover chicken with marinade and refrigerate for at least one hour.
Grill the chicken on the grill on both sides until well cooked. Safe internal temperature for chicken and poultry is 75 °C (minimum). Use a meat thermometer to measure it. It’s the only safe way to tell if meat is cooked. Afterwards remove the fillets from the grill and allow to cool for 5 minutes before cutting.
Fry the bacon until crispy. Set it aside on a paper towel to drain excess oil.
Cut chicken fillets into thin slices.
Grill the bread over the BBQ until golden brown.
Now assemble the sandwich. Spread BBQ sauce on both bread slices. Take one slice. The chicken goes on first. Then add tomatoes, avocado and romaine lettuce. Bacon goes on top. Add a sprinkling of herbs and cover with the second slice of bread.
Your grilled chicken sandwich is ready to serve! Enjoy!
Learn how to start a charcoal grill properly.
For more tips see our Charcoal Grilling 101.
Featured photo by jf valeriano from Pexels
What kind of food can you cook on a charcoal grill?
The short answer is — just about any food.
For My BBQ Table sets we use charcoal grills, and charcoal grills are well-known for versatility. They are easy to use and can be used for all kind of foods and occasions. You can use one for anything from breakfast with family to full-on BBQ party with friends, cooking anything from steaks and burgers to fruits and light veggie snacks. And with a My BBQ Table set a lot can be done simultaneously.
See the ideas below for inspiration.
What Can You Cook On My BBQ Table?
Full-On BBQ Party
My BBQ Table set is the perfect choice for a full-on BBQ party.
And also one of the best gifts for BBQ lovers. The table is spacious, and can comfortably seat a group of people. The grill itself is large enough for a group of people to cook multiple foods simultaneously. Meat, fish, seafood, veggies or even fruit. Place steaks and meat on one corner of the grill, veggies in the other, and a frying pan in the middle.
Everyone’s happy as everyone is getting their favourite food.
Breakfast / Sunday Brunch
You can also cook your breakfast on My BBQ Table.
Just remember that it takes some time for the grill to heat up, some 15 – 20 minutes. See our guide to starting a charcoal grill, to make it as easy and effortless as possible. Accordingly, it’s going to be a slow breakfast. Enjoy it with a newspaper or a book, or spend it chatting with your loved ones or friends. You can also turn it into a very long breakfast, as a 2-kilo packet of charcoal briquettes is enough to keep it going for up to 5 hours.
What breakfast foods can you cook on My BBQ Table?
Almost anything works. You can grill some sausages, veggies and bread. You can also use a pan to make an omelette on a grill. Heat the pan, and pour eggs and veggies as you normally would. Next to the pan, lie out sausages and some more vegetables.
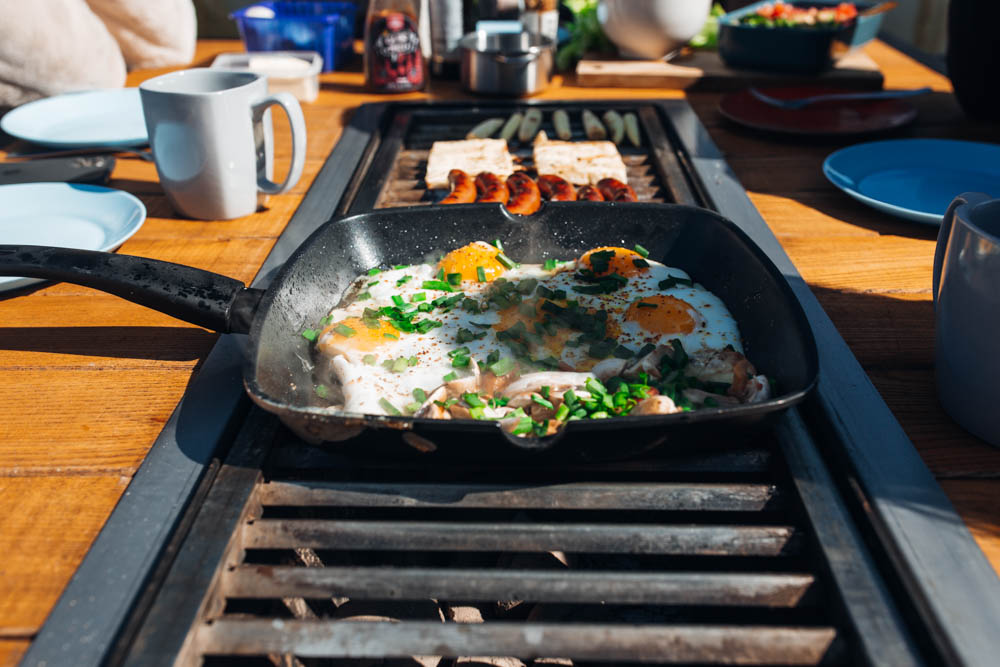
Preparing breakfast on a charcoal grill
Making your breakfast tea or coffee on a grill also is possible.
Wait until the grill is hot enough. Pour water in a little pot and boil it. Put some tea or coffee and let it simmer for a better, stronger taste. You can keep your tea warm on a grill.
Food to Cook On a Charcoal Grill (My BBQ Table)
What’s the best food to cook on a grill?
Meat
Cooking with charcoal has its advantages.
Oh, the deep smoky flavour, we love it so much!
The food cooked on a charcoal grill has a unique deep smoky flavour to it. This is especially nice when cooking meat and fish, and for many it’s one of the top reasons to choose a charcoal BBQ grill. You can also enhance the taste of your food by adding herbs, dried citrus peels for a subtle zing, or by mixing charcoal with some firewood.
There are different types of BBQ smoking woods to choose from. Each type of wood create a different flavour. Experiment with different types to decide which you like the best.
What kind of meat you can grill on a charcoal grill?
Here are some mouth-watering ideas for your next grill party:
- Steak
- Ribs
- BBQ pulled pork
- Meat on skewers
- Pork chops
- Charcoal grilled hamburgers
- Hot dogs
- Barbecued beef brisket
- Barbecued chicken (see grilled chicken sandwich recipe)
- Turkey breast
See our favourite homemade chicken marinades and easy dips.
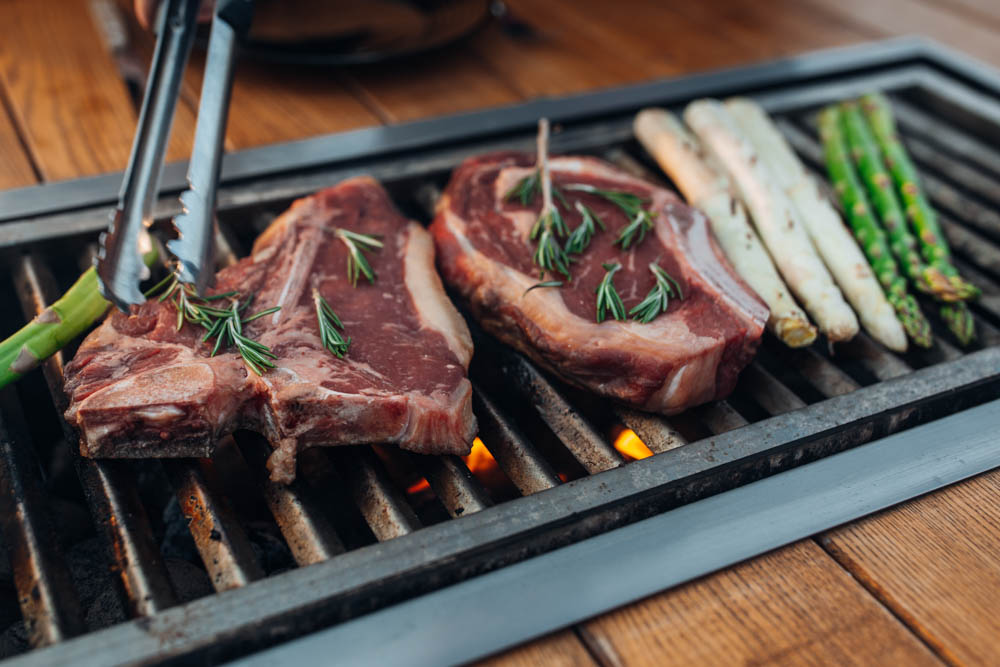
Grilling meat on My BBQ Table
Seafood
Grilled seafood tastes amazing.
Some even believe that it tastes better when cooked on a grill.
Fish, prawns, lobster, crab and other seafood can be easily cooked on a grill.
Some of the best fish to grill are tuna, salmon, cod, sea bass and red snapper. Choose which type of fish cut you want to prepare — fillet, steak or whole fish.
Cooking whole fish requires least work and preparation, and is beautiful to serve. However, it is quite difficult to eat. Grilling fish on skewers is a great option too. It will take some time to prepare them, but it’s worth it, as it’s both easy to eat and also looks great on a plate. You can add chunks of onions, pineapples, bell peppers or other veggies in between the fish chunks.
Do you love mussels? Mussels grilled on a bed of pine needles are amazingly delicious — the aroma alone is to die for, and the taste is heavenly.
Vegetables and Healthy Snacks
Everything from roasted veggies to fried bananas.
Here are some examples of healthy snacks you can cook on a grill:
- Grilled corn on the cob
- Grilled avocado with tomatoes and herbs
- Grilled cabbage
- Grilled baby potatoes with rosemary
- Grilled whole cauliflower
- Grilled glazed pineapple
- Grilled figs with crème fraiche and honey
- Grilled bananas with chocolate coating (you can melt chocolate on the grill, in a small saucepan)
Grilled Pizza
It may surprise you, but you can actually make a pizza on a grill.
It’s quite easy, really.
Especially if you’re going to use a ready made pizza base.
Put the dough or the pizza base on the pan or directly on the grill grates (they must be greased) cook it on both sides. Take it off, cover with a little bit of olive oil, then cover it with tomato puree. Sprinkle on your toppings, ending with cheese. If you use meat, it must be pre-cooked. Finish cooking on the grill or pan.
Vegetarian Food
What vegetarian foods can you cook on a grill?
There are countless options of delicious vegetarian foods you can make on a charcoal grill. Grill vegetables for salads. Make veggie burgers or plant based Beyond burgers. Make a grilled cheese sandwich. Grill the bread on both sides, and cheese separately from the bread, then assemble the sandwich.
Grilled halloumi cheese is delicious.
Grilled mushroom sandwiches are delicious, too.
You can also make a veggie pizza on a grill.
It’s easy and delicious.
In short — just about any food can be cooked on a grill.
For more tips see our Charcoal Grilling 101.
How to clean a charcoal grill?
What’s the best way to clean a charcoal grill?
How to clean your My BBQ Table built-in grill?
My BBQ Table sets come with a removable charcoal grill. In this guide we’ll answer some of the most frequently asked questions about the topic, everything you might find useful if you already own or plan to buy a charcoal grill like this. While in some ways these grills are unique — they are much easier to use and clean, the same cleaning techniques could be applied also to others.
Do You Need to Clean a Charcoal Grill?
Is it even necessary, and if yes — how often should you do it?
First of all, yes, it’s necessary. Same like you wash a cooking pan, a barbecue grill also requires cleaning. Secondly, only light cleaning of the grate and the grill is necessary after every use. More deep cleaning is recommended once or twice a season, or once a month if you use your grill a lot.
How to Clean a Charcoal Grill (My BBQ Table)?
How to keep a grill clean?
Just follow these 5 simple steps.
1. Brush the Grate With a Grill Brush
Better do it soon after you’ve finished cooking.
It’s easier to loosen the bits of food when the grate is still warm.
2. Let Your Grill Cool Down
It’s best to let it cool down naturally.
My BBQ Table sets come with a removable charcoal grill, and are super easy to clean. You can easily take the grill out, and put it on its stand. It will fasten the process, while allowing you to easier clean the table or to set it up for something else. By taking it out, you’ll also make your BBQ table last longer and look just as good after a year as it looks now.
3. Brush the Grate One More Time
To get rid of the last bits of food that may still be there.
The grate is the part of the grill that you place food on. That’s the only part of the grill that comes in contact with the food, hence it’s important to keep it clean and well-kept. It’s also for your own safety, clean grate means less chance of grilling flare-ups. You can skip this point if you were cooking your food in a pan.
Use the included handles to remove the grate safely.
4. Wash the Grate, If Necessary
It’s easier to do it while it’s still warm.
You can use a special cleaner or make your own.
Here’s how you can make your own cleaner for grill — mix 250 ml of water with 250 ml of vinegar in a spray bottle. Shake it and spray the grates with this mixture. Let it sit for some 10 – 15 minutes. Afterwards clean it off with a cloth or sponge.
5. Empty the Grill of All Ash
Some do it every time, others — not so often.
It’s better to do it every time you’re cleaning a charcoal grill. If you do so, it will make things much easier in the long run — it will be easier for you to keep your barbecue grill clean and ready for a party.
My BBQ Table
How to Clean Charcoal Grill Grates (Deep Cleaning)?
Once in a while every barbecue grill needs a deep cleaning.
There are two simple ways to clean charcoal grill grates.
- You can use a special charcoal grill cleaner solution.
It’s available in almost any supermarket around the world.
You will still need a cloth, sponge or brush for cleaning.
- Make your own cleaning solution.
Alternatively you can also make your own cleaning solution from vinegar and water. Mix 250 ml of water with 250 ml of vinegar in a spray bottle. Shake the bottle. Spray the grates with this mixture, and let it sit for 10 – 15 minutes. Afterwards clean it off with a cloth or sponge.
Important note! If it’s already an old charcoal BBQ grill, one you’ve been using for a couple of seasons already, don’t be too hard when cleaning it. Especially if you haven’t been cleaning it too much before. Don’t try to make it look brand new and shiny again. The dark layer it may have by now protect it also against rust and corrosion.
How to Clean a Charcoal Grill Without a Wire Brush?
What if you don’t have a wire brush?
How can you clean the grate without one?
It’s not a problem, as it can be done also without it. Here are 2 ways how you clean a grill without a wire brush. The best part about both methods is the fact that all you need is either a piece of aluminum foil or one half of an onion. Yes, an onion. Wiping the grate with an onion, makes it much easier to clean it, by loosening stuck-on bits of food.
For the best result do it shortly after you’ve finished cooking.
For more tips see our Charcoal Grilling 101.
Happy grilling!